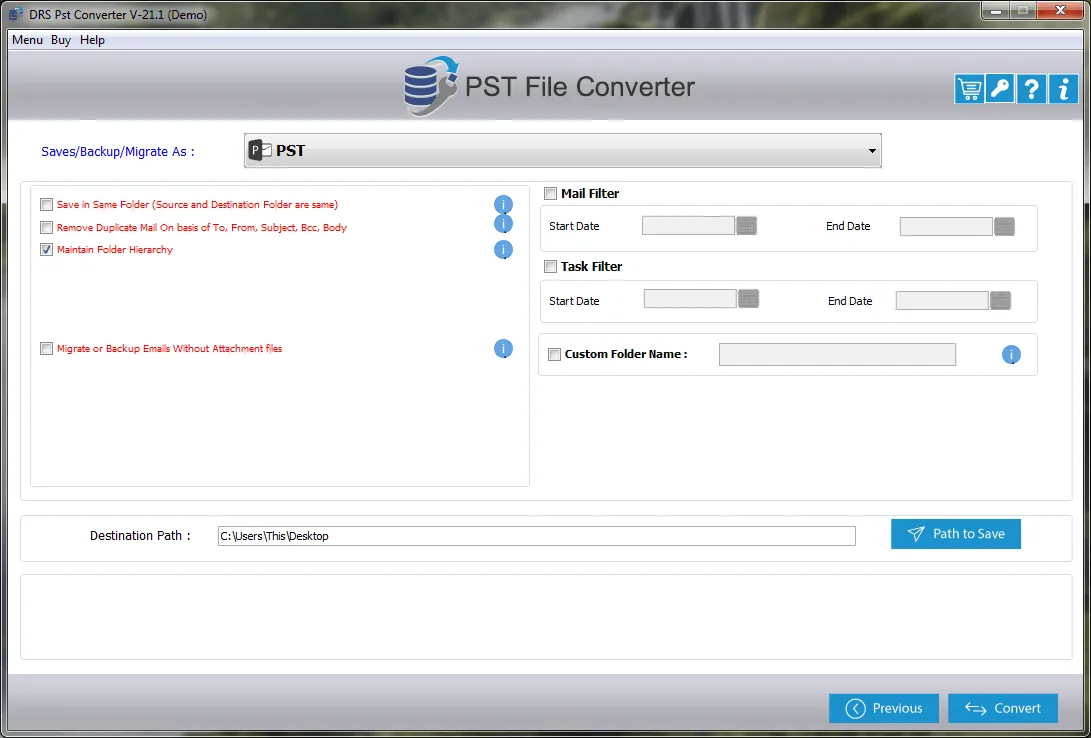
Step 8
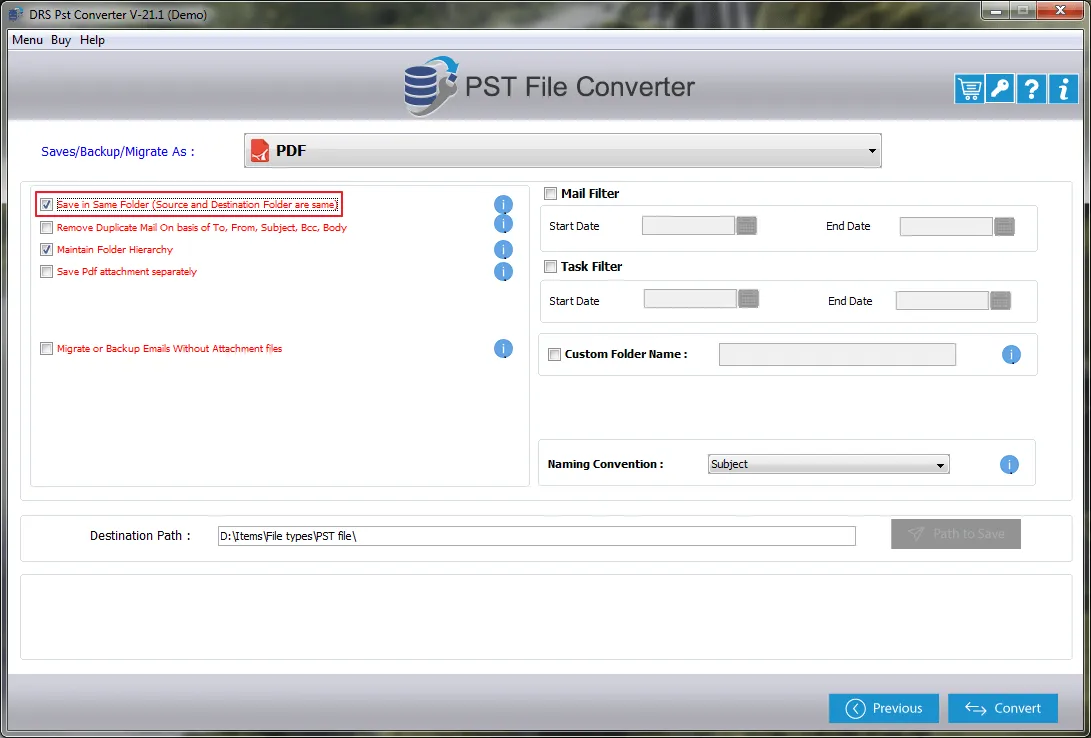
Expand the Save/Backup/Migrate As field and choose PDF file format from the list.
Step 9
Tick the Save in Same Folder option to save the output file in the folder containing the input PST file.
Step 10
Select the Remove Duplicate Mail on basis of to, from, subject, bcc, and body options if you want to exclude duplicate mailbox items.
Step 11
The Maintain Folder Hierarchy option sustains the hierarchy of mailbox items. It is enabled by default.
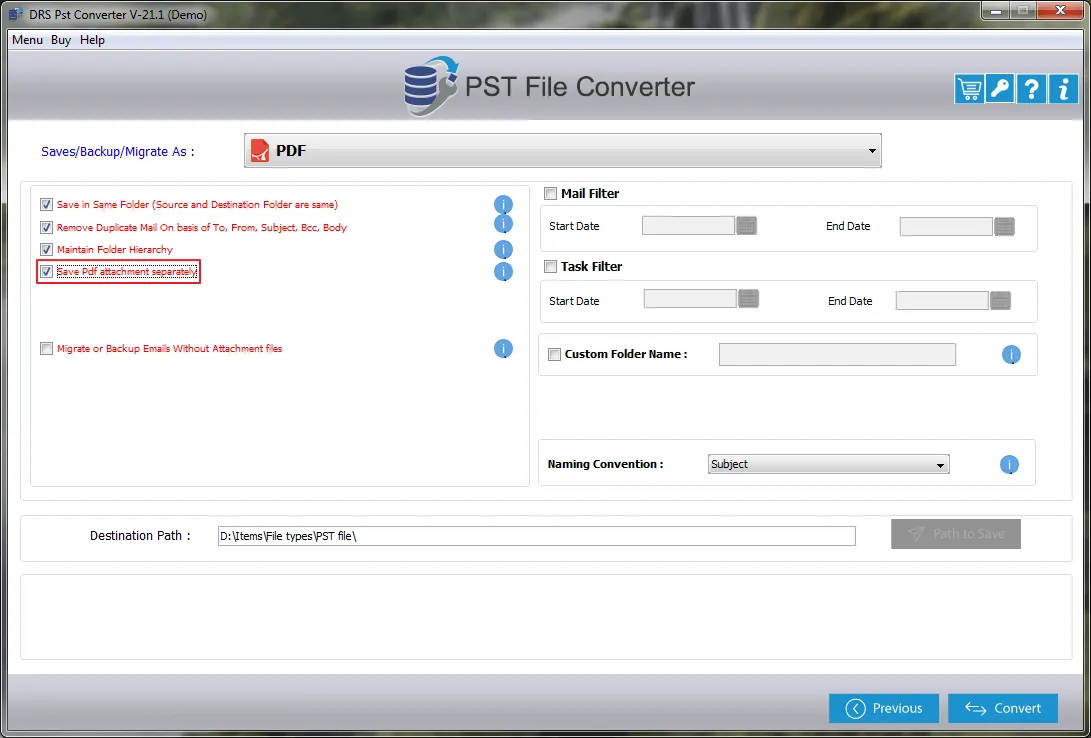
Step 12
Using the Save PDF Attachments Separately option, you can save the PDF attachments in a separate folder.
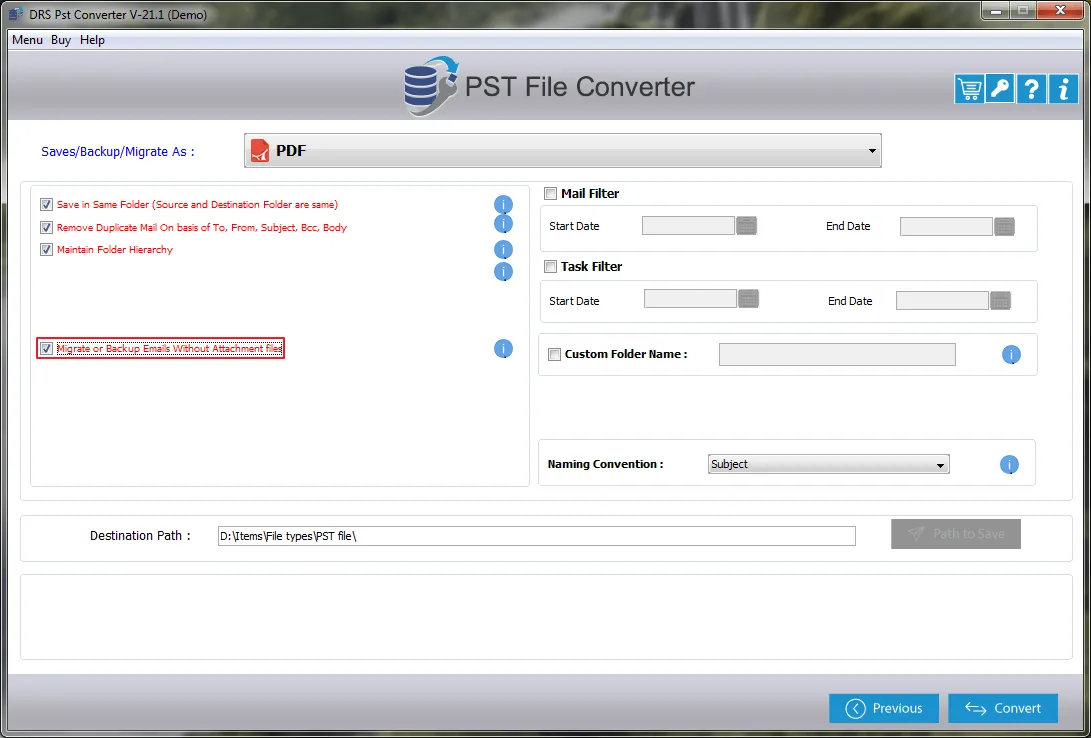
Step 13
The Migrate or Backup email without Attachment File option allows you to export your Outlook mailbox without attachments. Select this feature to prevent the migration of email attachments.
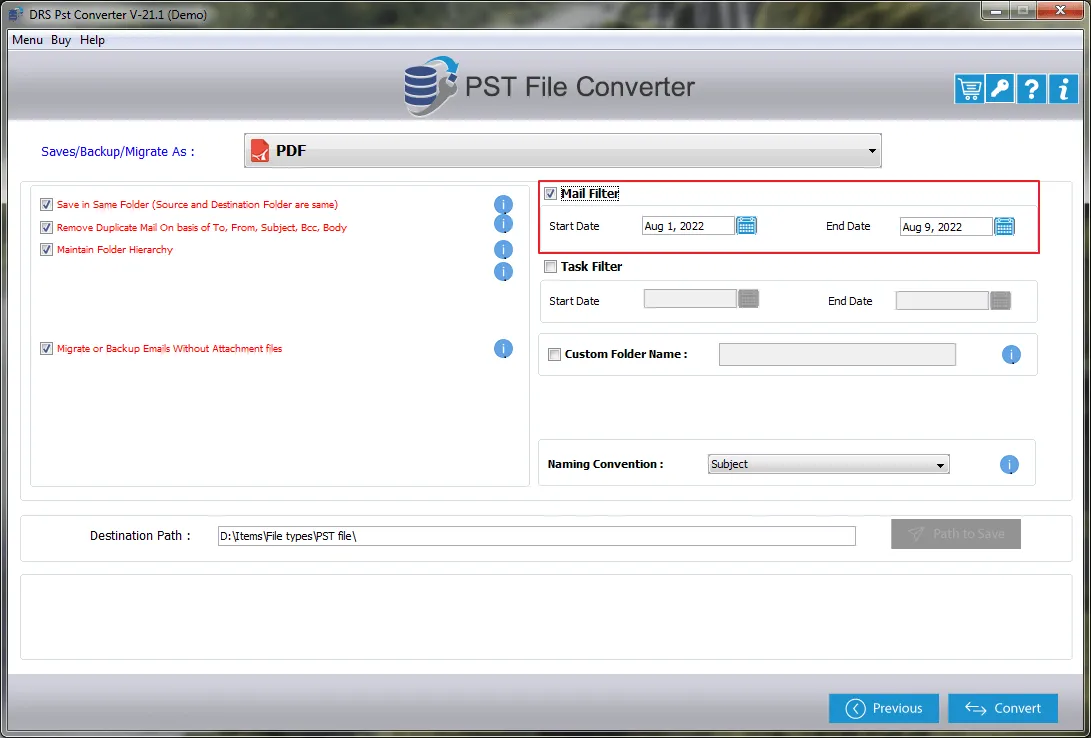
Step 14
The Mail Filter option allows you to convert emails of a particular date range. Tick the Mail Filter and enter suitable Start Date and End Date to specify the date range.
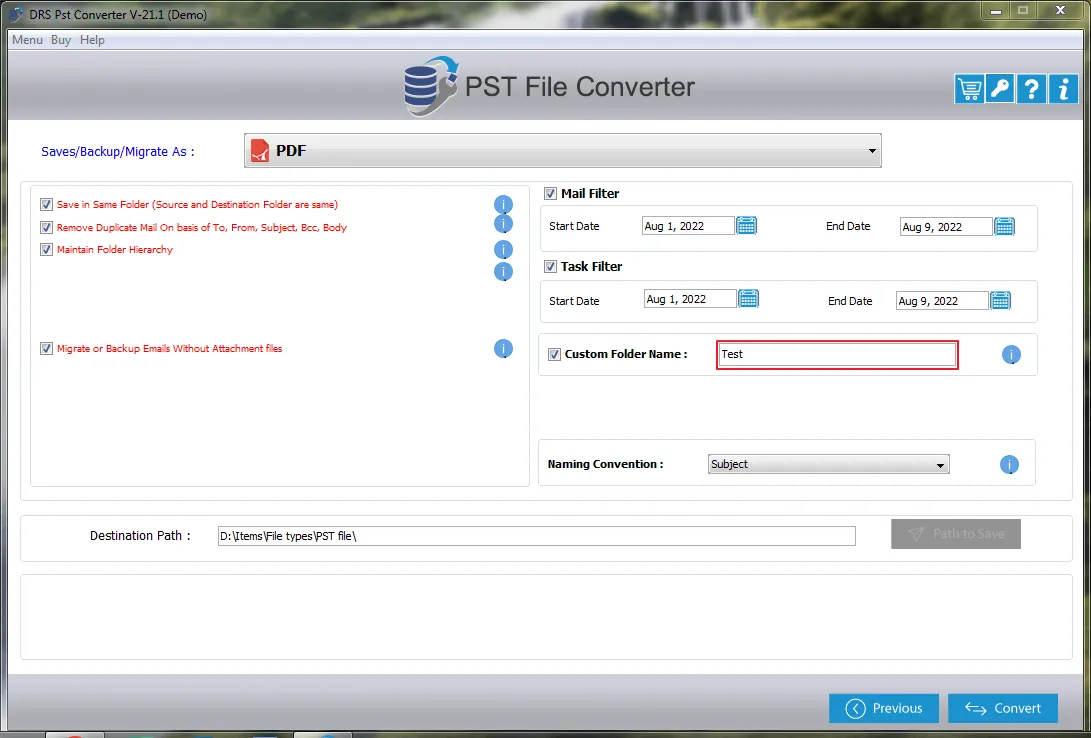
Step 15
Similarly, select the Task Filter option and specify the date range in the Start Date and End Date.
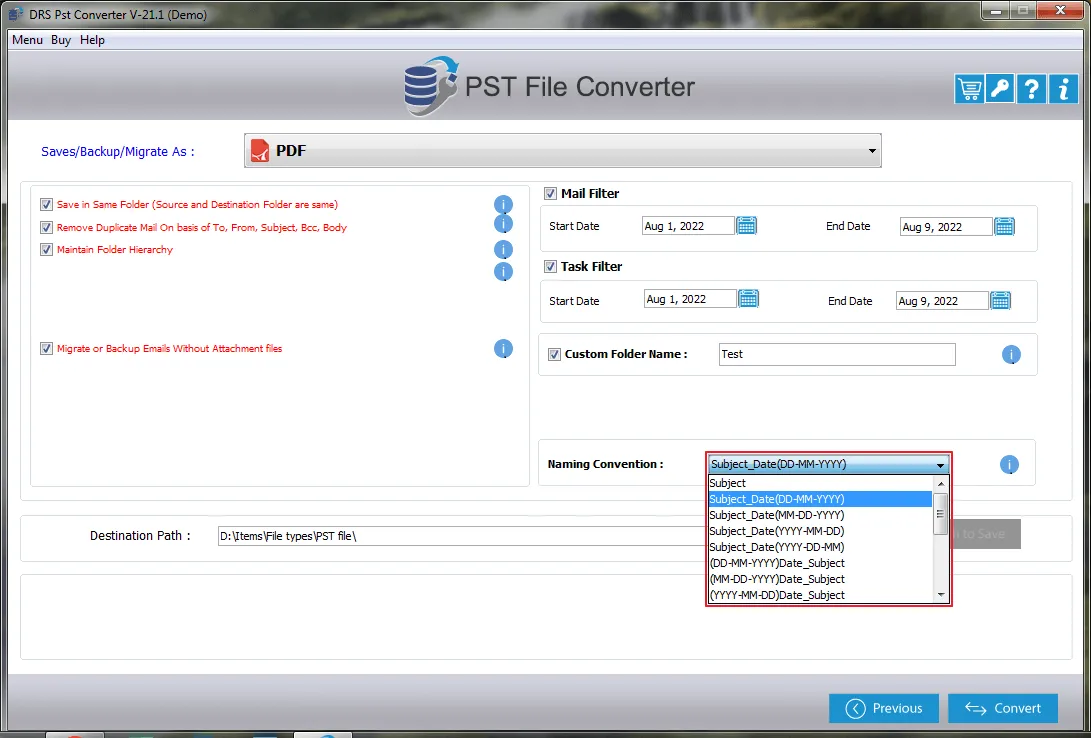
Step 16
If you want to give the resultant folder a custom name, tick the Custom Folder Name option and fill in the desired name in the field.
Step 17
After that, choose a suitable Naming Convention from the drop-down.
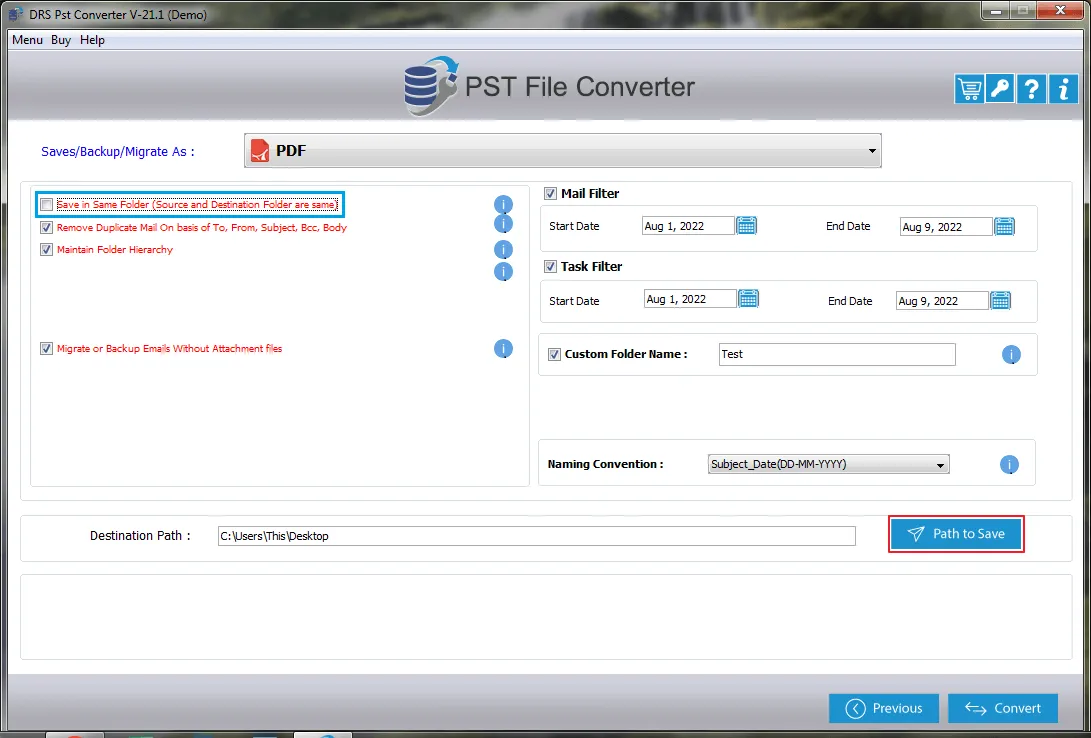
Step 18
After that, press the Path to Save button and define the destination for the resultant file.
Note: This option will be disabled when you opt for the Save in Same Folder option.
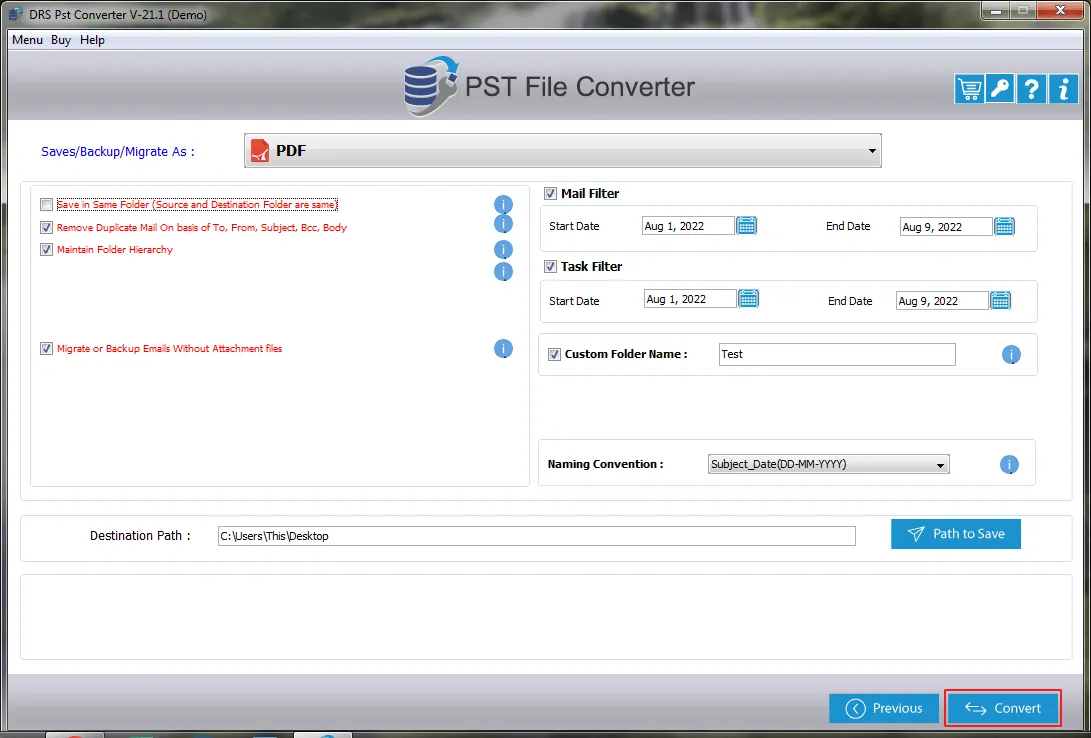
Step 19
Finally, hit the Convert button to start the file conversion.
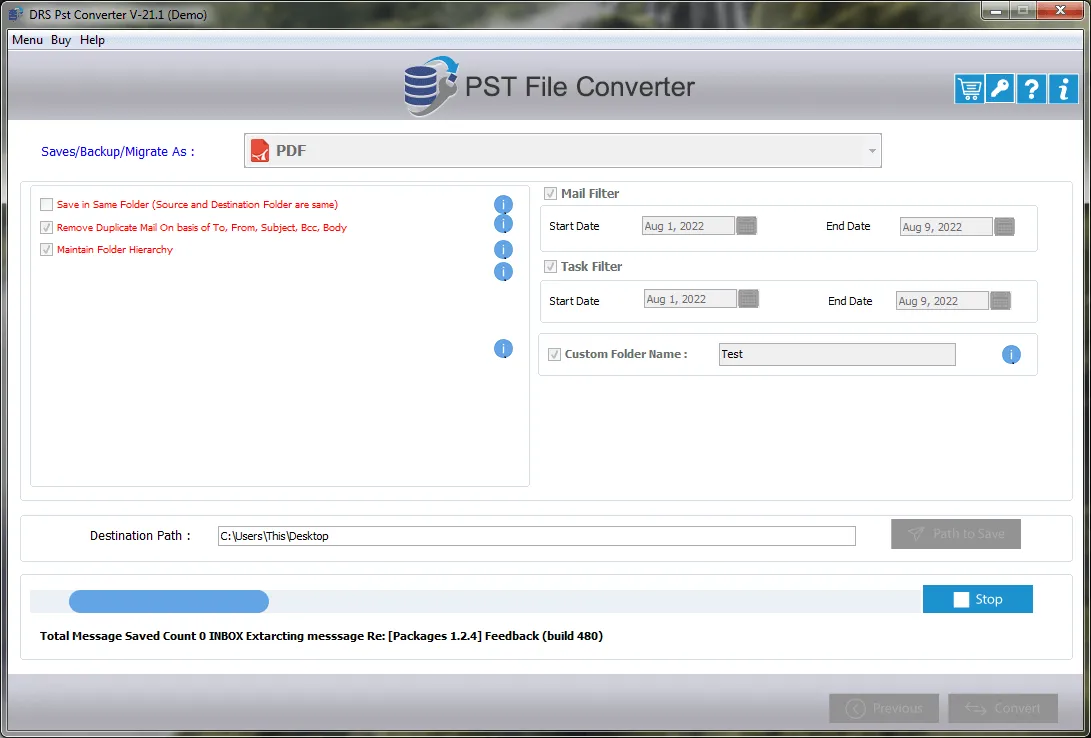
Step 20
The tool initiates the file conversion. The time taken will depend upon how large your input PST file is.
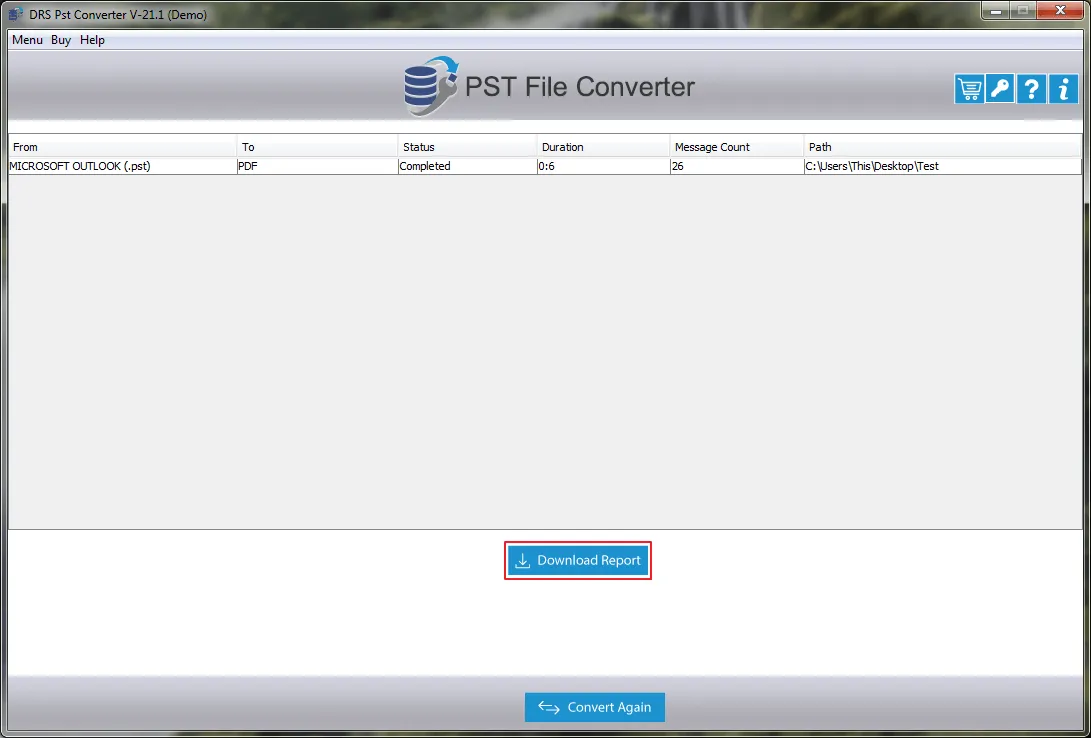
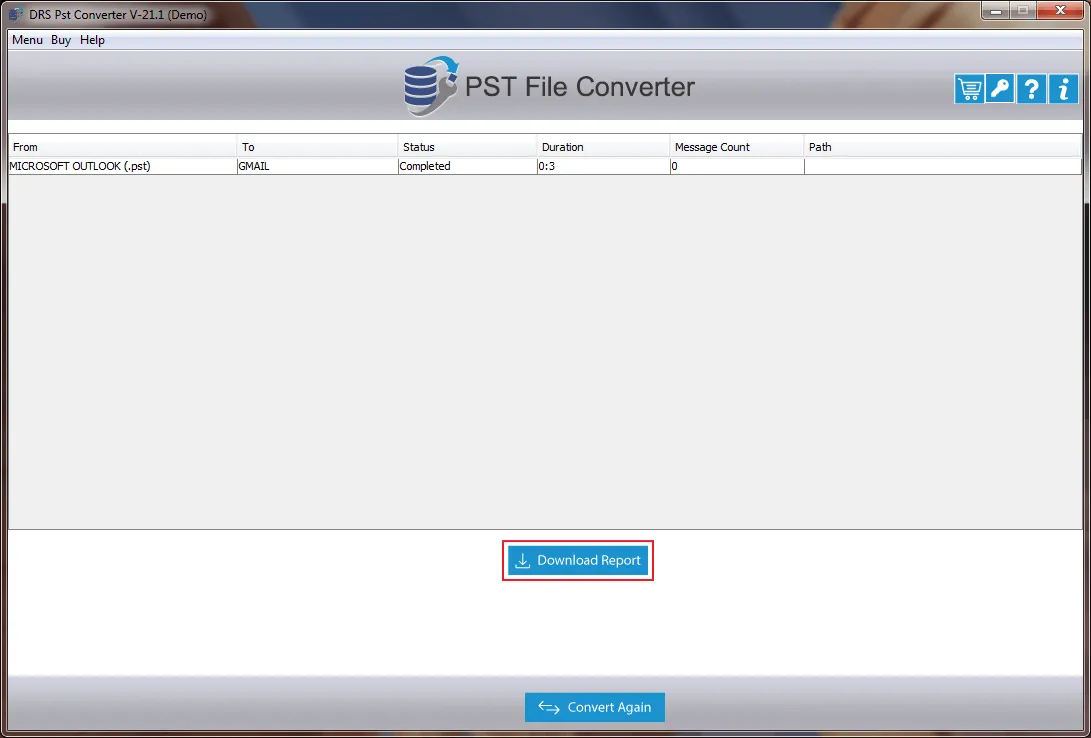
Step 21
After successfully migrating your data, click on the Download Report button to download the conversion report as a CSV file.
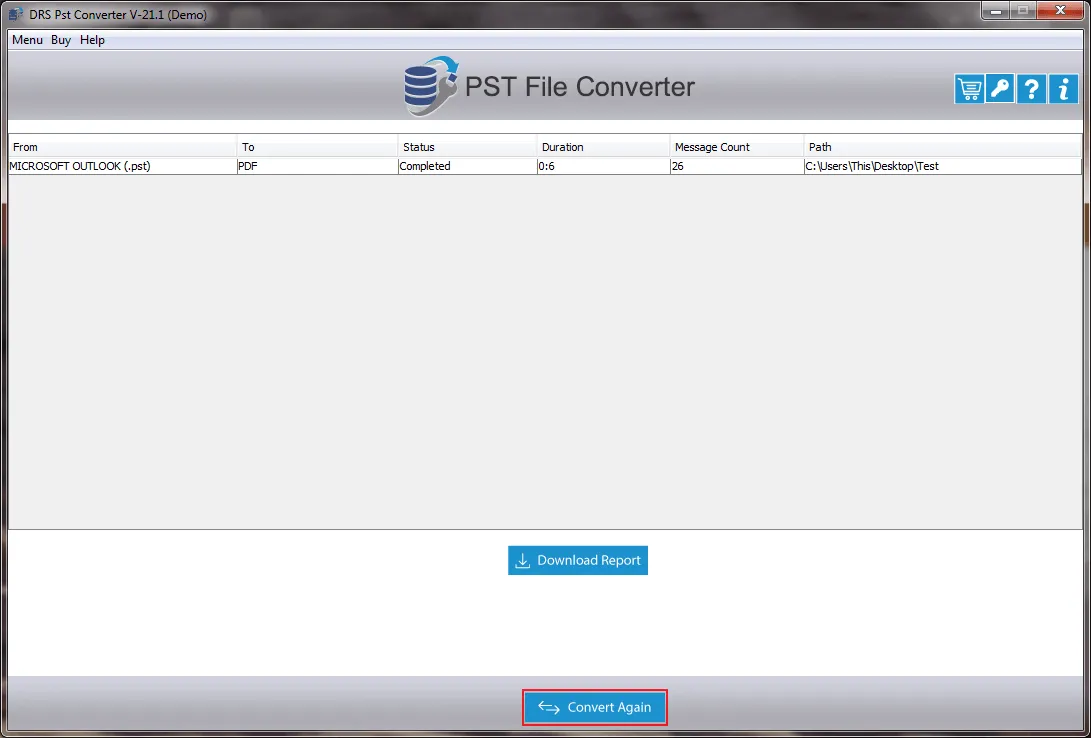
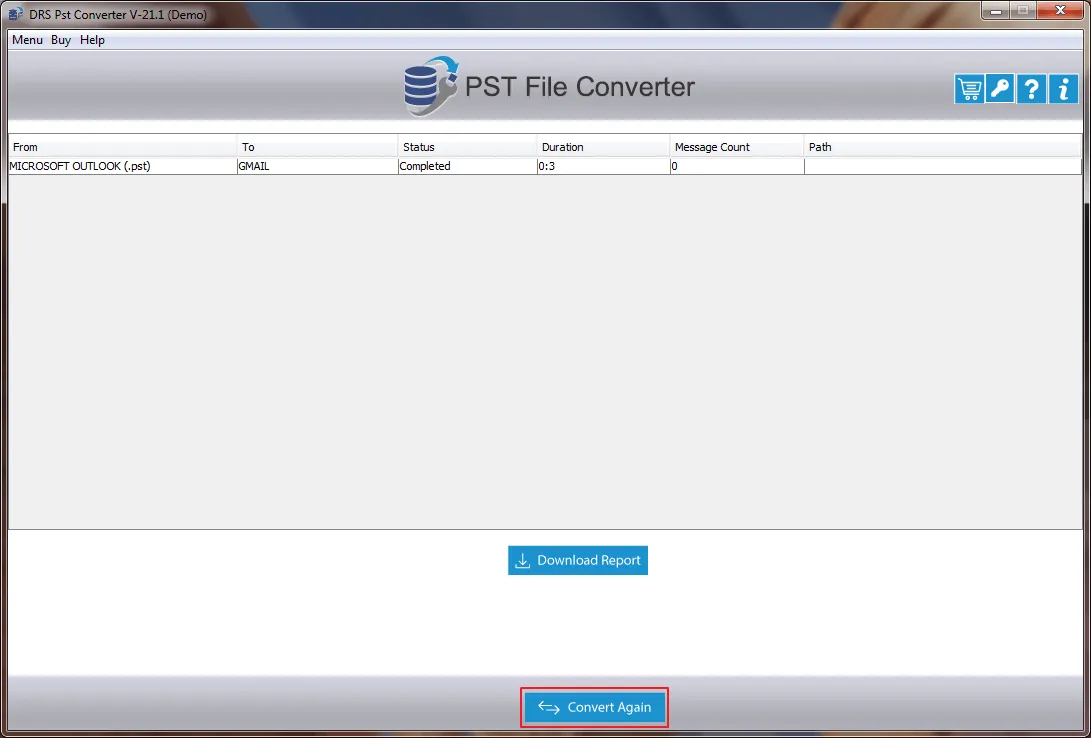
Step 22
Click on the Convert Again button to convert Outlook PST file into other file formats or email client.
First, perform steps 1 to 7 as mentioned above. After that, follow the below procedure.
Step 8
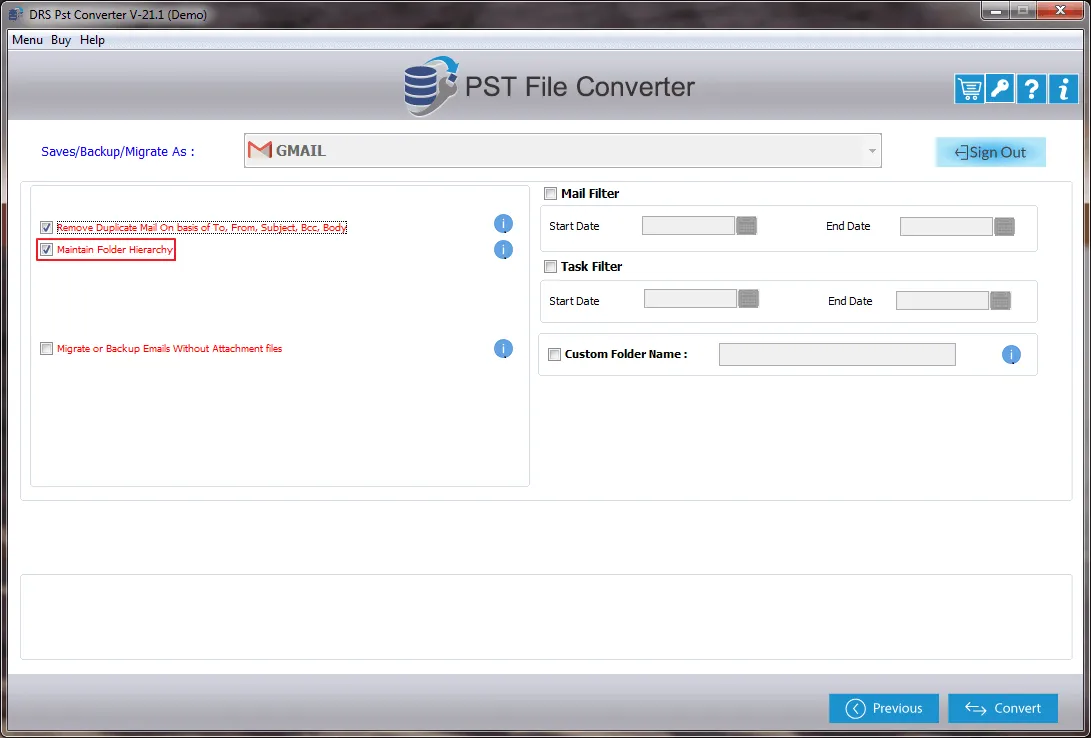
Click on the Save/Backup/Migrate As field and choose Gmail from the drop-down.
Step 9
Now, fill in your Gmail email account and the app password. Click on the Sign In button.
Step 10
After successfully logging in to your Gmail account, tick the Remove Duplicate Mail on the basis of to, from, subject, bcc, and body options. It will prevent duplicate items from migration.
Step 11
The Maintain Folder Hierarchy option keeps the mailbox items in the correct order. It is enabled by default.
Step 12
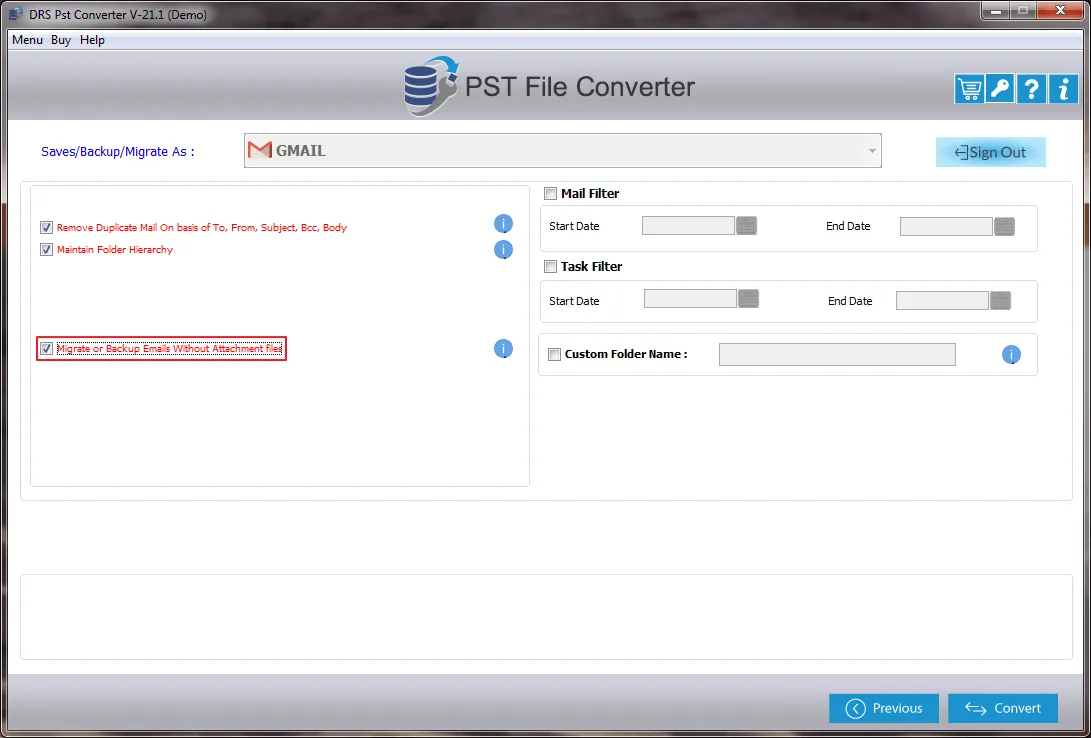
If you want to exclude email attachments from migration, tick the Migrate or Backup without email attachment files option. It allows you to migrate only emails.
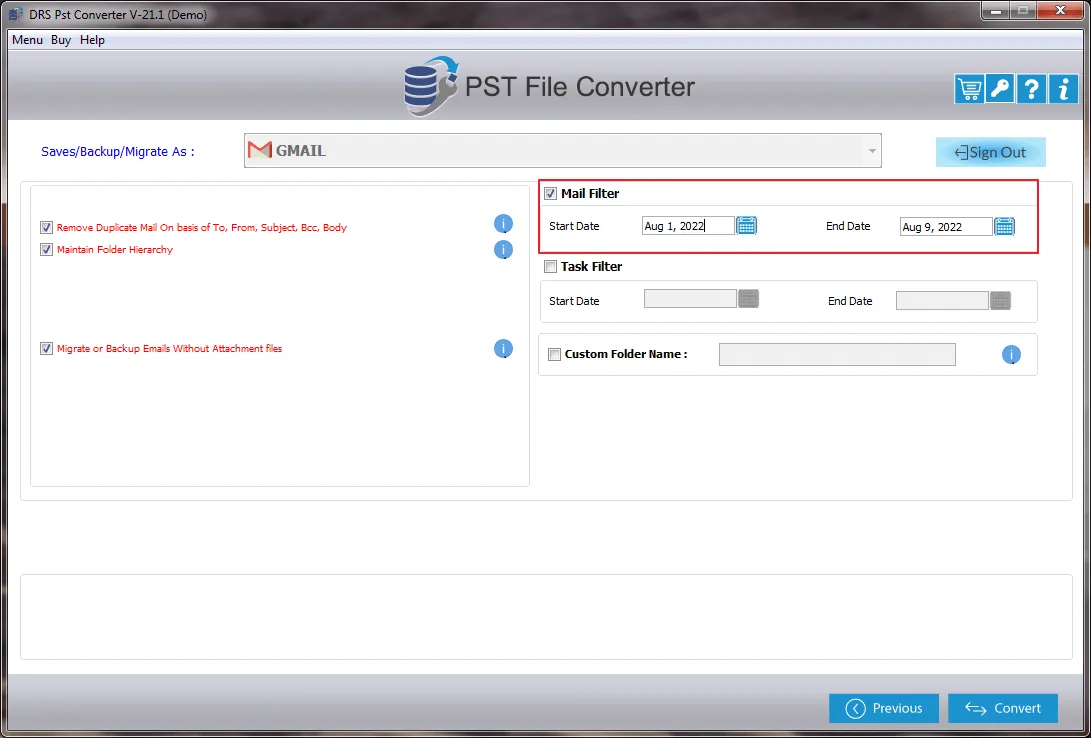
Step 13
Tick the Mail Filter option and assign the appropriate Start Date and End Date. This date range filter will assist you in migrating emails of a specific date range.
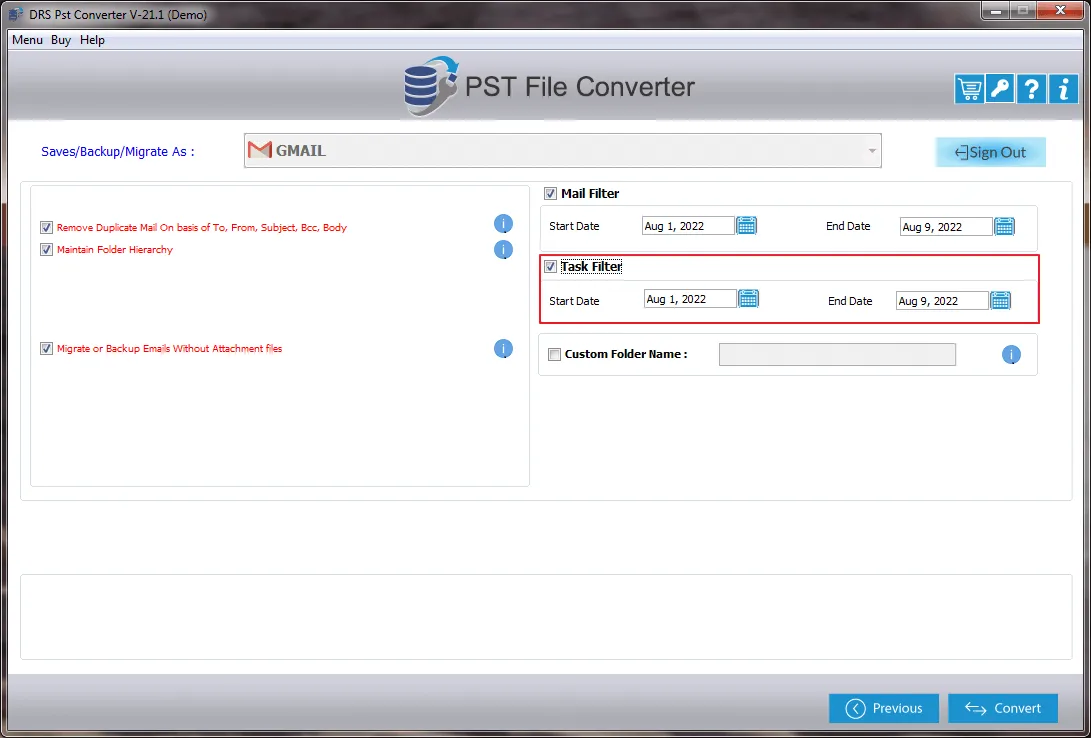
Step 14
Now, tick the Task filter option and enter suitable Start Date and End Date.
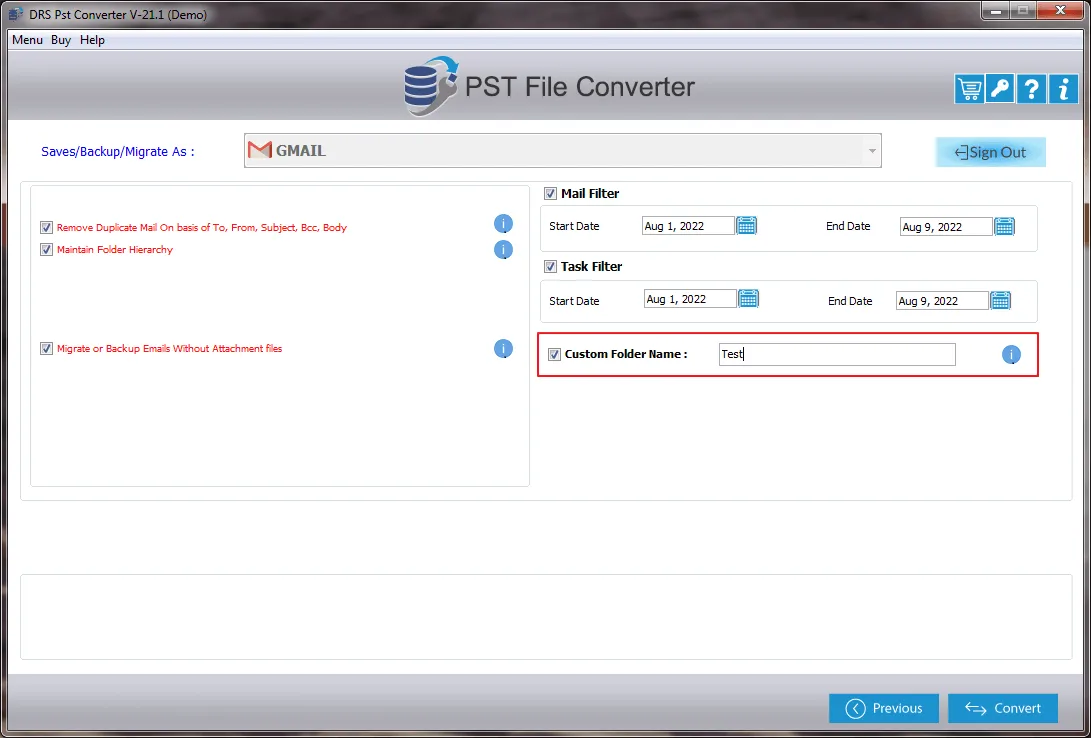
Step 15
Next, Mark the Custom Folder Name option and assign the desired name to the folder that will store the migrated data.
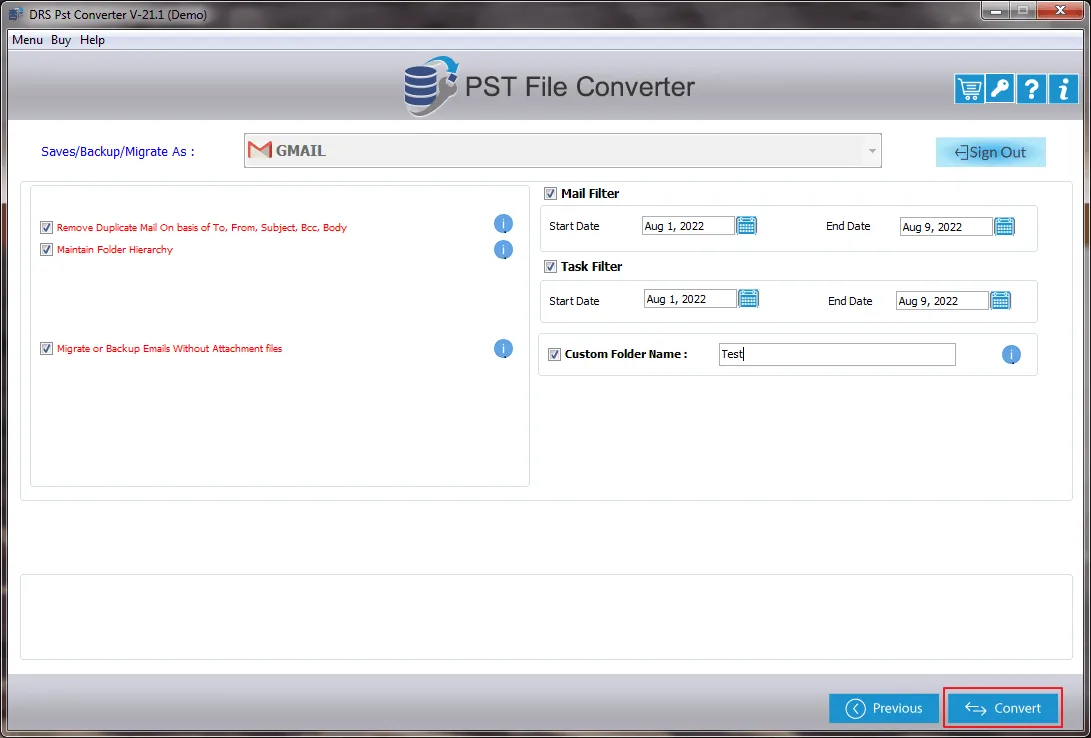
Step 16
Finally, hit the Convert button to start the migration.
Step 17
Your Outlook mailbox data is migrating to your Gmail account. The time taken depends upon the size of your mailbox data.
Step 18
After completing the migration, the conversion report will appear. You can download the report as a CSV file by pressing the Download Report button.
Step 19
If you want to repeat the conversion, click the Convert Again button.