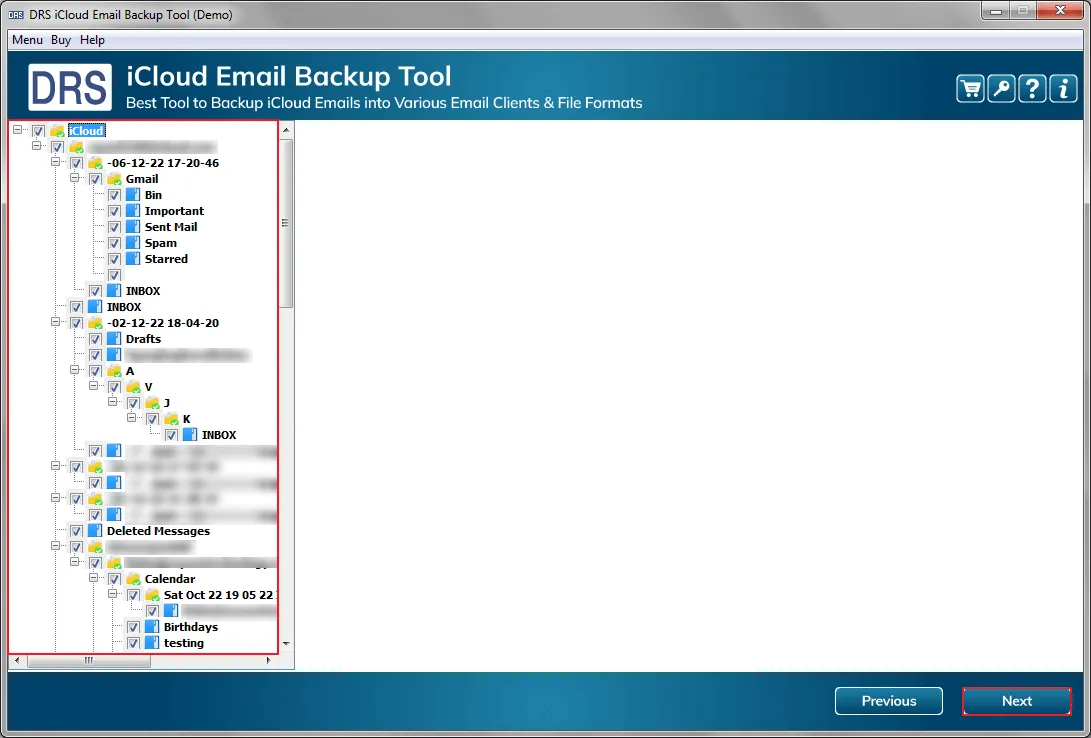
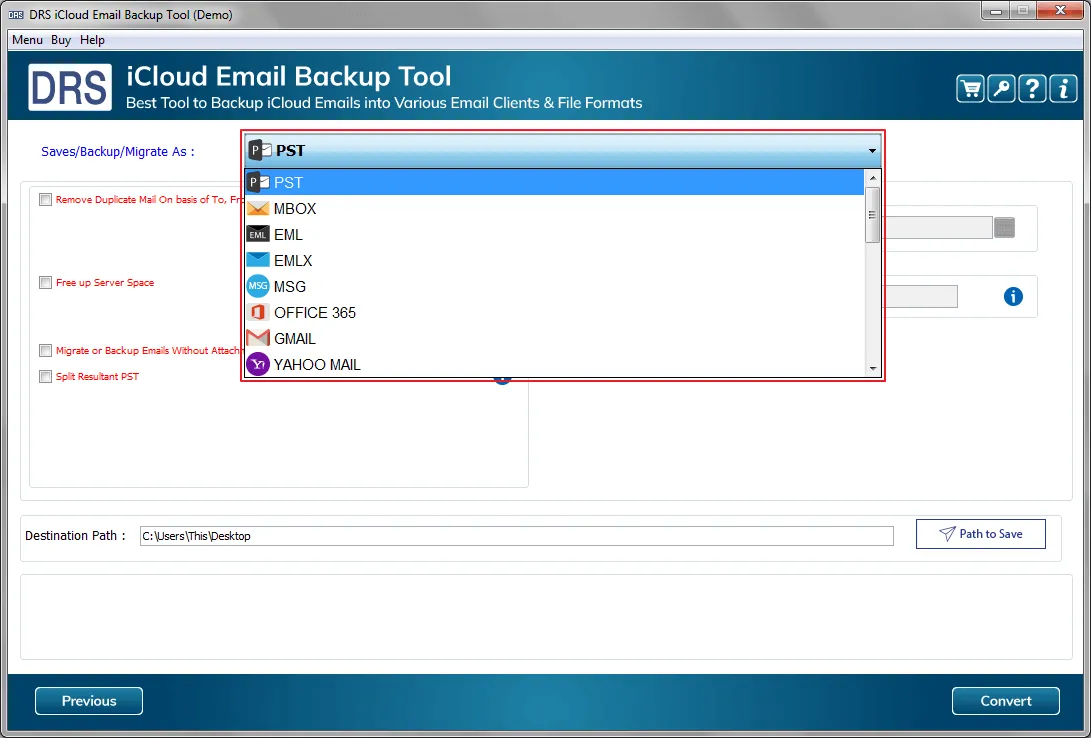
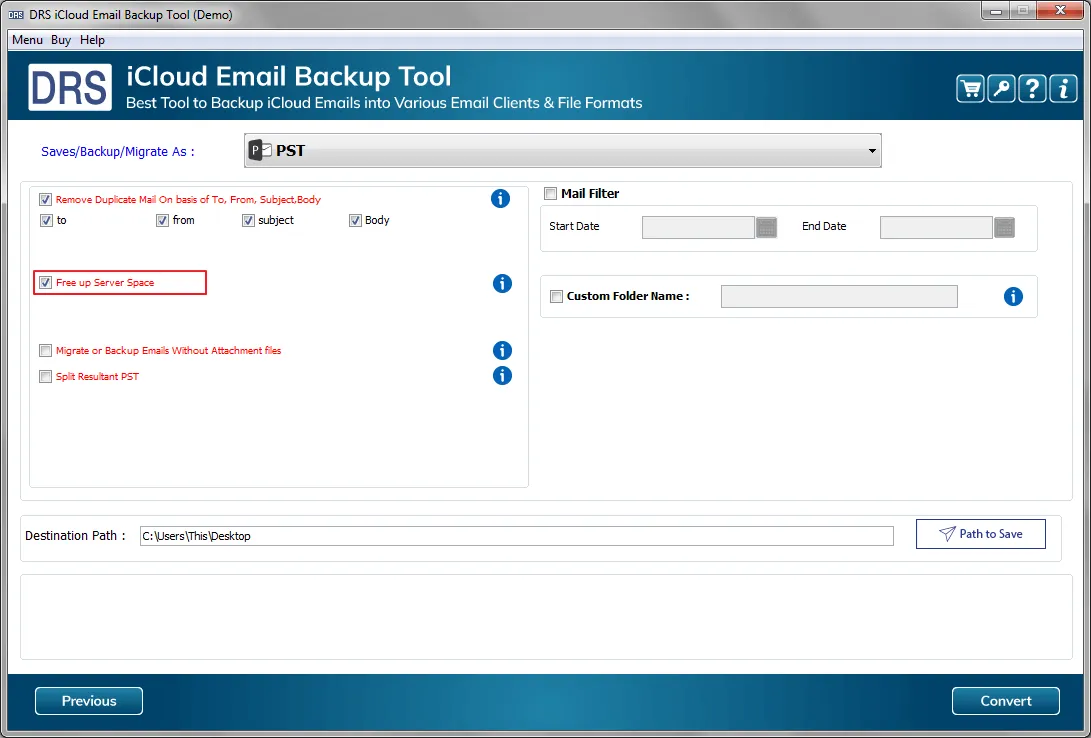
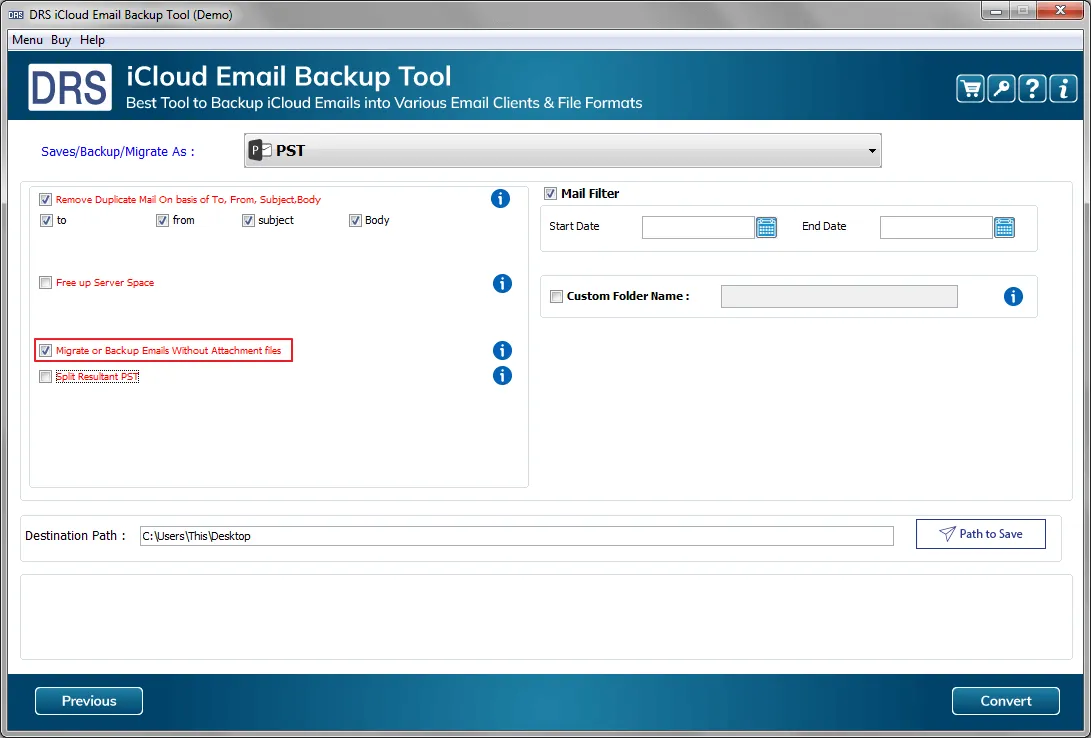
Learn to Use iCloud Emails Backup Software to Migrate Complete iCloud Mailbox Data

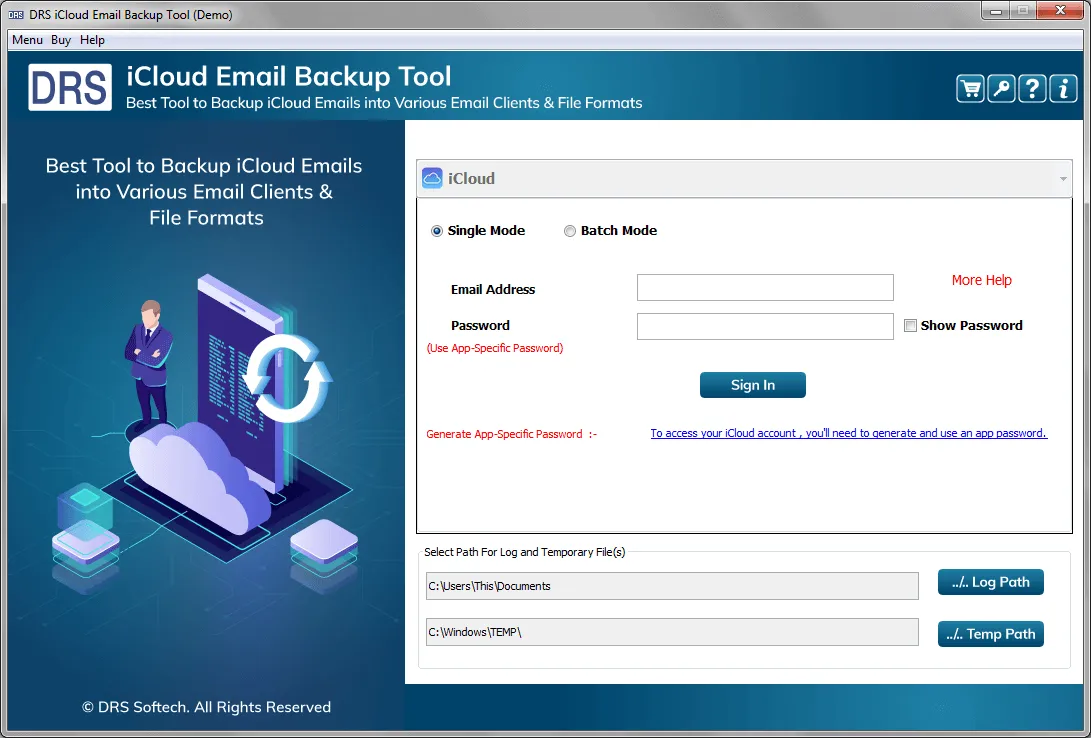
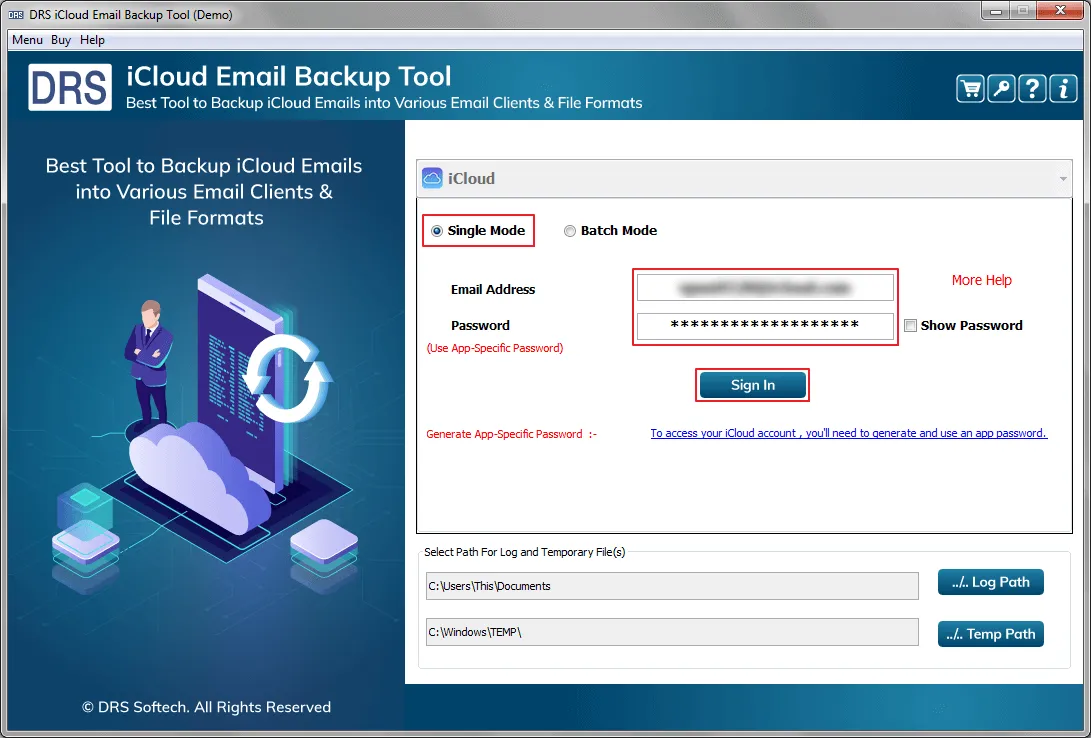
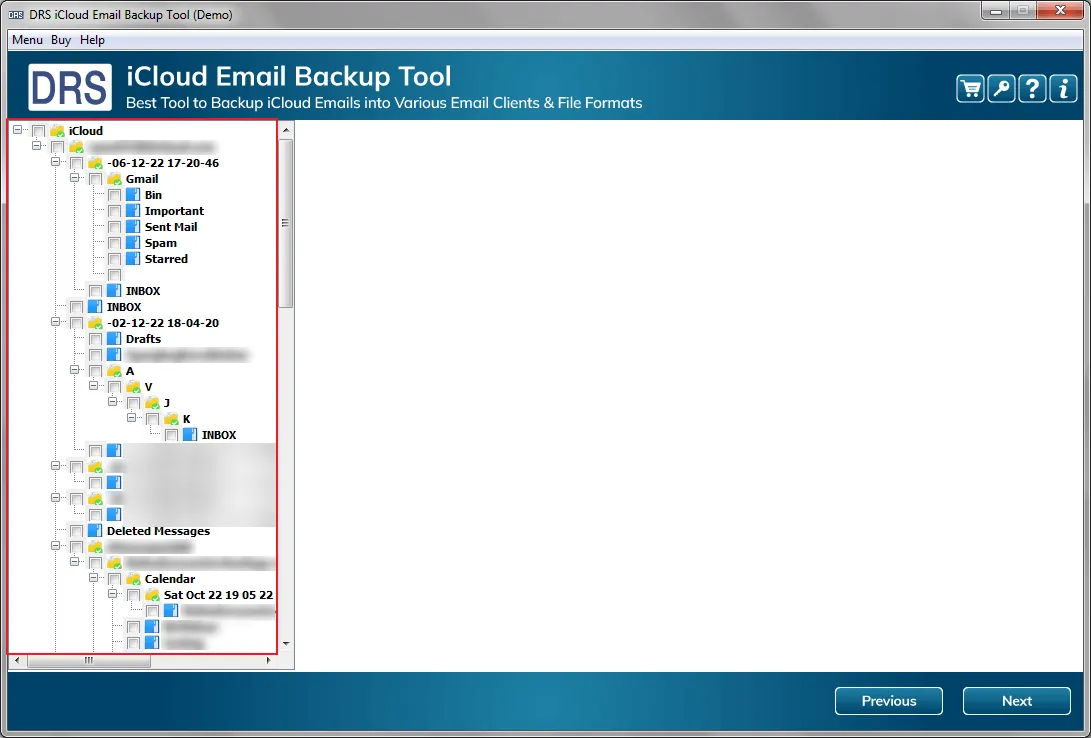
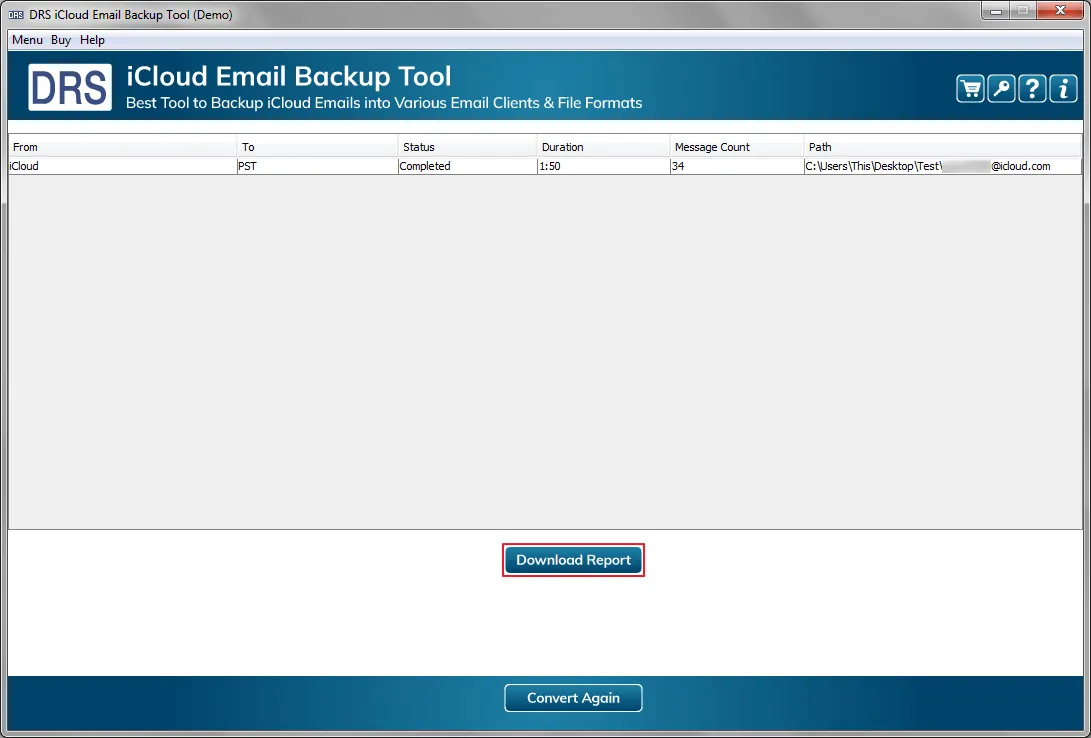
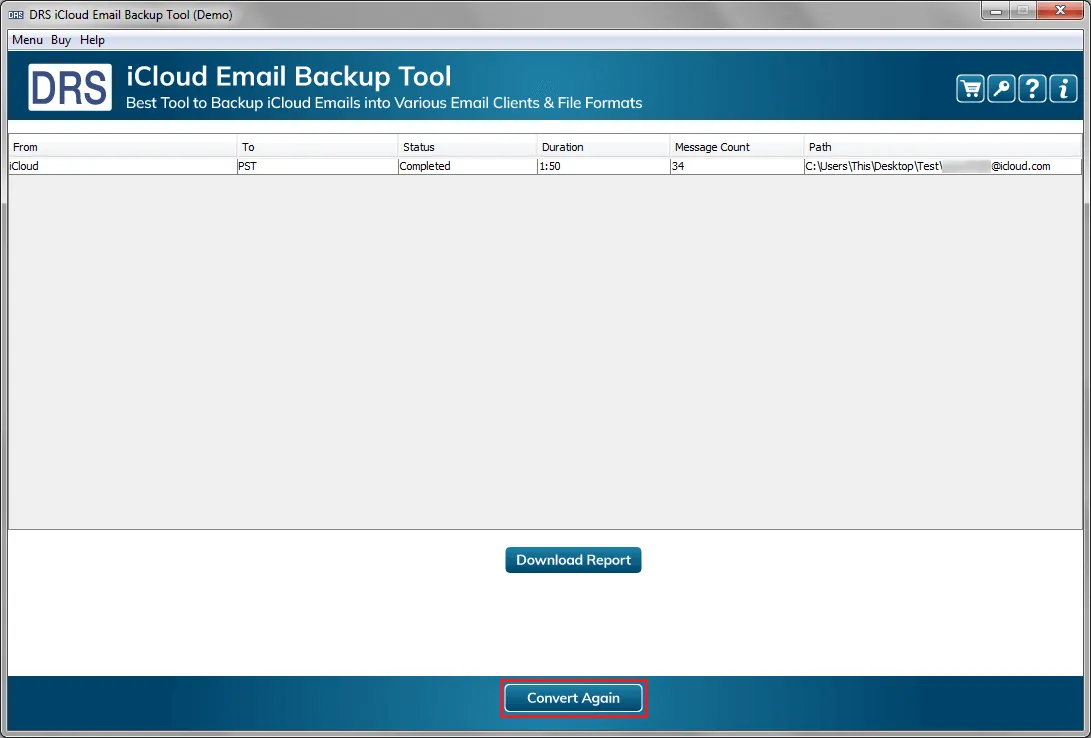
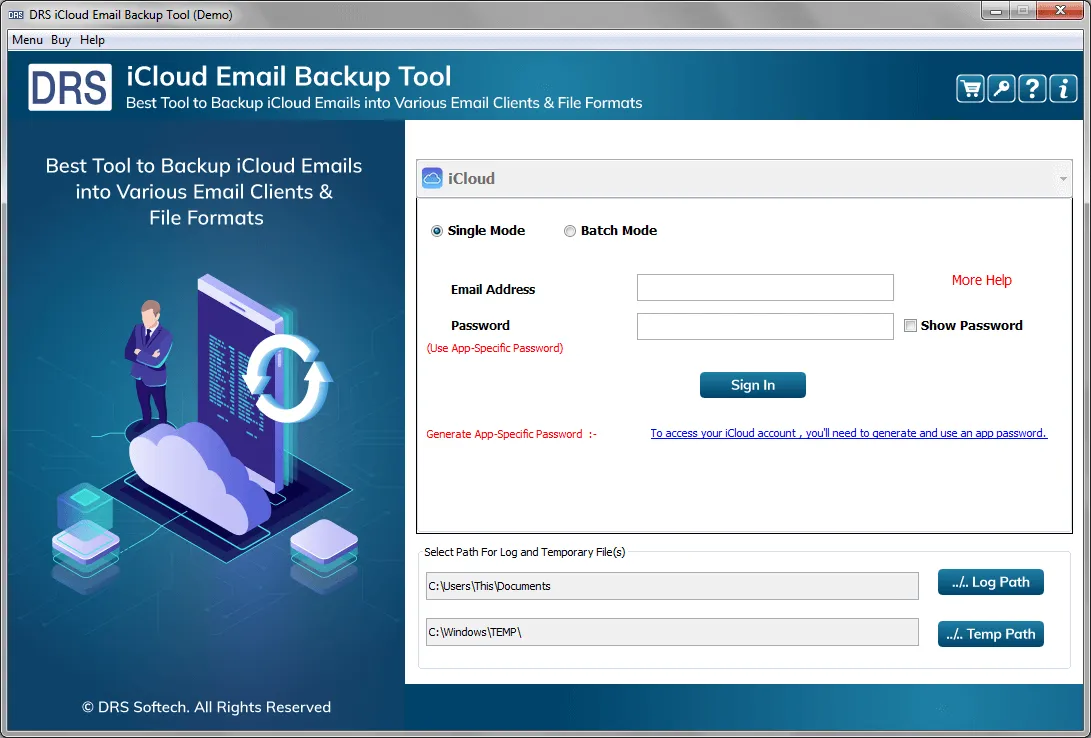
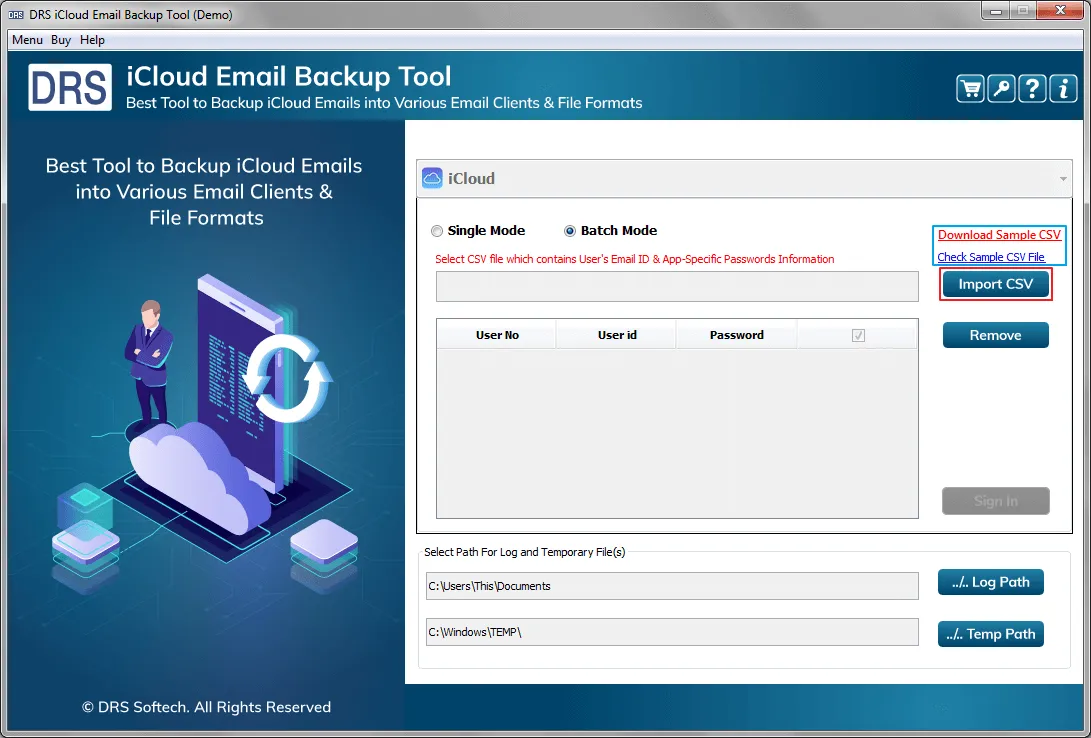
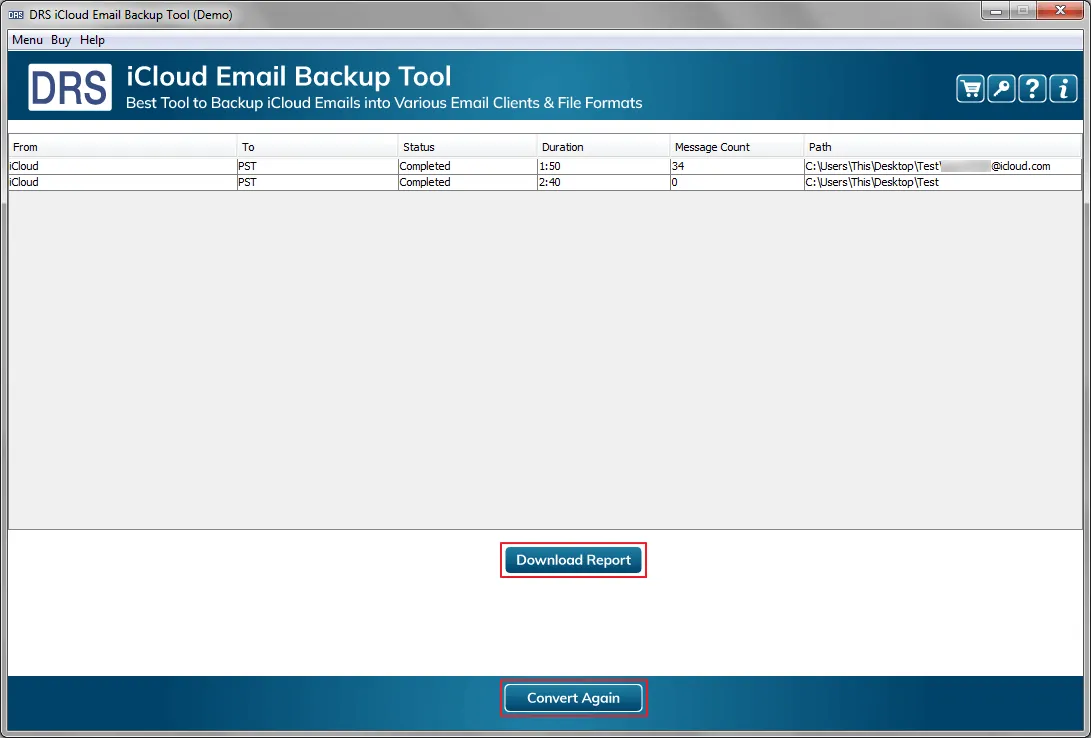
Cloud Migration iCloud Backup Tool is a risk-free solution to back up iCloud mailbox email. This application is designed with a self-explanatory GUI to give a better user experience even to non-technical users. This software working manual is a comprehensive guide that describes the complete working of the software and the use of every option. Therefore, read this guide for a better understanding of the product.

iCloud Backup Tool

Follow the Below Steps to Backup Emails from a Single iCloud Account

Step 1


Visit the official website CloudMail Migration and download the iCloud Backup Tool. Install the application and run it as administrator.

Step 1

Step 2


Single-mode allows you to migrate a single iCloud email account. Fill in the iCloud email address and app password in their respective fields. Click on the Sign-in button.

Step 2

Step 3


The application verifies your iCloud account and fetches your mailbox folders.

Step 3

Step 4


In the left section you will see the preview of the mailbox folders of your iCloud email account.

Step 4

Step 5


Now, tick the mailbox items you want to backup and click on the Next button to proceed further.

Step 5

Step 6


After that, expand the Save/Backup/Migrate As field. Choose the required file format and email clients from the list.

Step 6

Step 7


Next, tick the Remove Duplicate Mail on the basis of the to, from, subject, and body options. It prevents the backup of duplicate mailbox items.

Step 7

Step 8


If you want to delete the mailbox items after migrating them, tick the Free up server space option. It helps you to leave the required free space on the server for new emails.

Step 8

Step 9


Furthermore, for excluding the email attachments from iCloud backup, enable the Migrate or Backup emails without Attachment files option.

Step 9

Step 10


While selecting PST as the output file format, you can choose the Split Resultant PST file option and define a suitable file size. It will divide a large-size PST file into various smaller files.

Step 10

Step 11


The Mail Filter option is a date range filter that permits you to back up emails of a specific date range. Enable this option and provide the appropriate Start Date and End Date.

Step 11

Step 12


You can also give a custom name to the resultant folder using the Custom Folder Name feature. Tick this option and assign any desired name in the respective field.

Step 12

Step 13


Now, click the Path to Save button to define the saving location for the resultant PST file.

Step 13

Step 14


After selecting the migration options, click on the Convert button to start the iCloud backup.

Step 14

Step 15


Now, the application processes your migration request. Wait till the backup gets completed.

Step 15

Step 16


After completing the backup, you will see the conversion report. You can download this report as a CSV file by pressing the Download Report button.

Step 16

Step 17


To backup, up your iCloud mailbox again in another destination format, click on the Convert Again button.

Step 17

To Migrate Emails from Multiple iCloud Email Accounts Follow the Below Procedure

Step 1


Download and install the Cloud Migration iCloud Backup Tool. Run it as administrator.

Step 1

Step 2


Opt for the Batch mode option to back up multiple iCloud accounts.

Step 2

Step 3


Now, click on the Import CSV button to import the CSV file containing the email address and app password of desired iCloud accounts.

Note: If you do not know how to create the CSV file, click on the Check Sample CSV file or the Download Sample CSV option.

Step 3

Step 4


Locate and select the CSV file of iCloud accounts and click on the Open button to add all accounts.

Step 4

Step 5


After adding the file, you will see all the accounts in the list. You can unselect any mailbox if required. Click on the Sign-in button.

Step 5

Step 6


The application will connect to all the accounts. After that, you will see a pop-up stating that the connection is successful. Click OK to close it.

Step 6

Step 7


Now, expand the Save/Backup/Migrate field to choose the resultant file format or destination email client.

Step 7

Step 8


After that, tick the Remove duplicate mail based on the to, from, subject, and body options. It will avoid duplicacy of email in the resultant file.

Step 8

Step 9


The Free up Server Space option will delete all emails from the iCloud mailbox after completing the migration. Enable this option if you want to create some free space on the server.

Step 9

Step 10


Using the Skip Trash folder feature, you can exclude the Trash folder from the mailbox backup.

Step 10

Step 11


Similarly, tick the Skip Junk Folder to prevent backup of Junk folder items.

Step 11

Step 12


If you want to back up your iCloud mailbox without email attachments, tick the Migrate or Backup email without attachment files option.

Step 12

Step 13


Select the Split Resultant PST feature and give the required size to break the output PST file into multiple smaller files of the specified size.

Step 13

Step 14


Next, tick the Mail filter option and enter the required Start Date and End Date to enable the date range filter and backup iCloud email between the specified date range.

Step 14

Step 15


If you want to name the resultant file, as per your requirement, enable the Custom Folder Name feature and provide an appropriate name in the field.

Step 15

Step 16


After that, click on the Path to Save button to choose the destination for the resultant file. It will get disabled when you select an email client as a destination.

Step 16

Step 17


At last, click on the Convert button to start the iCloud email backup.

Step 17

Step 18


After completing the migration, click the Download Report button to download a CSV file of the conversion report. Also, you can click on the Convert Again button to return to the migration page.

Step 18
logo

Millions of users have migrated their data securely using Cloud Migration Software. Stop performing complex DIY techniques and switch to the best solutions.