Software Guide to Perform Conversion of OST File to Outlook PST File Format
Let's explore a simple and comprehensive software working guide to help you understand the complete working procedure of the software.
Let's explore a simple and comprehensive software working guide to help you understand the complete working procedure of the software.
Visit the official website of CloudMigration and download OST to PST Converter Tool. Install the application and run it as administrator.
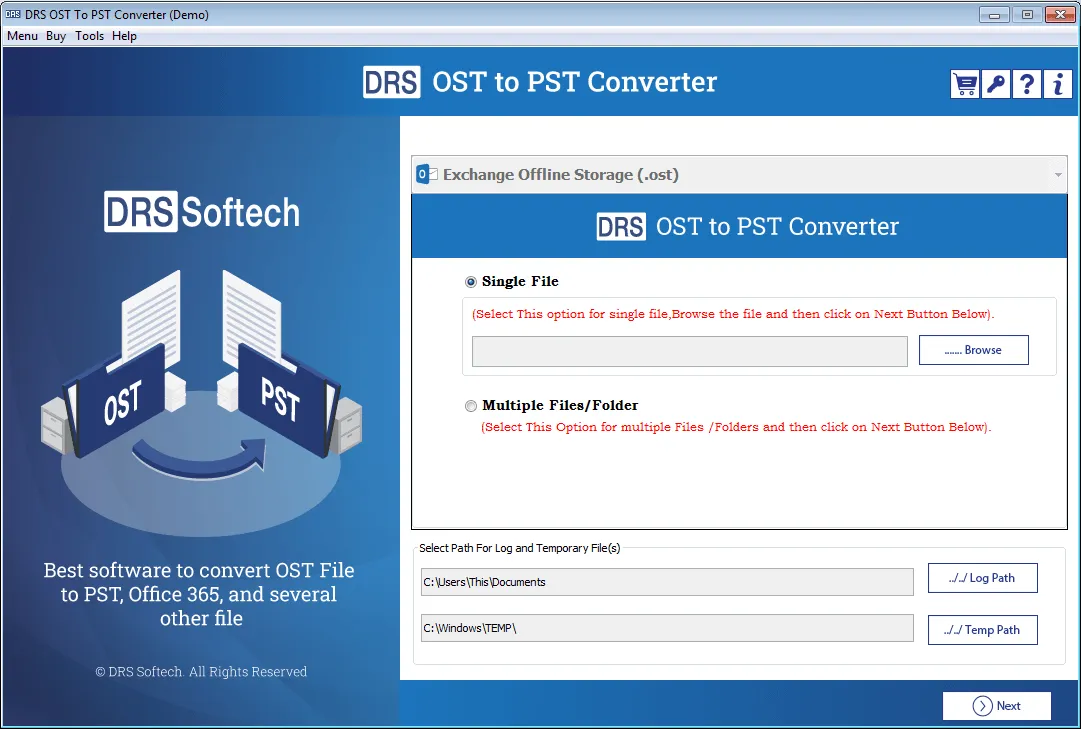
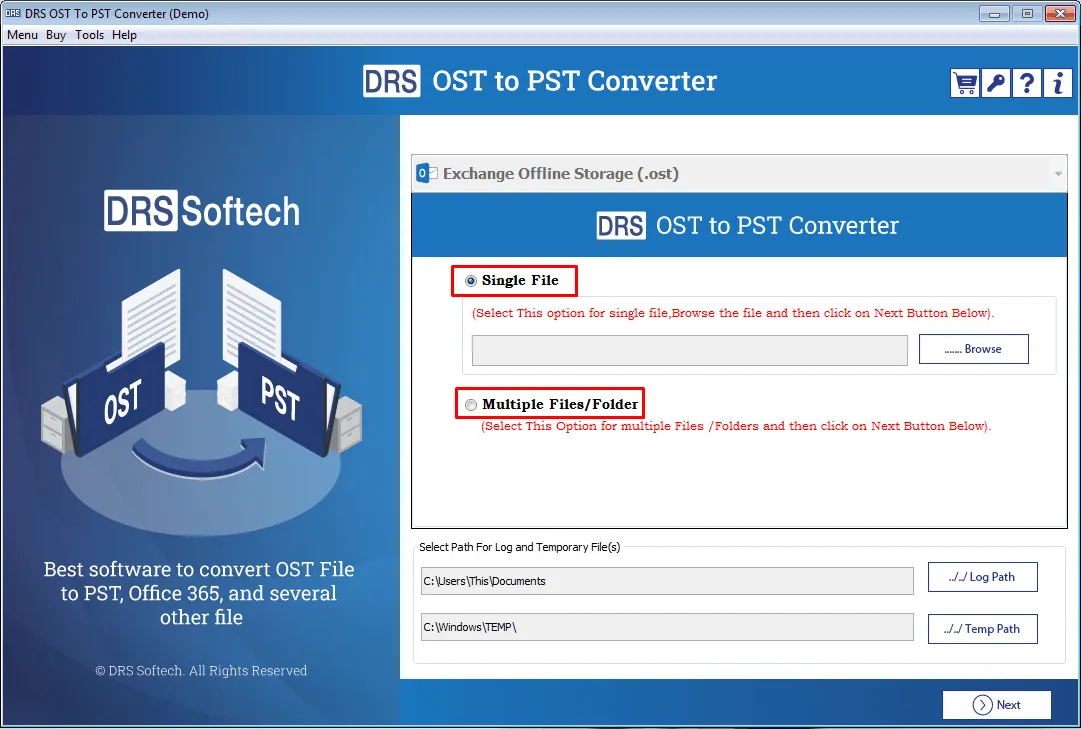
Now, you see two options: Single File and Multiple Files/Folder. You can add multiple OST files at once. The Multiple File/Folder option allows you to add an entire folder of OST files.
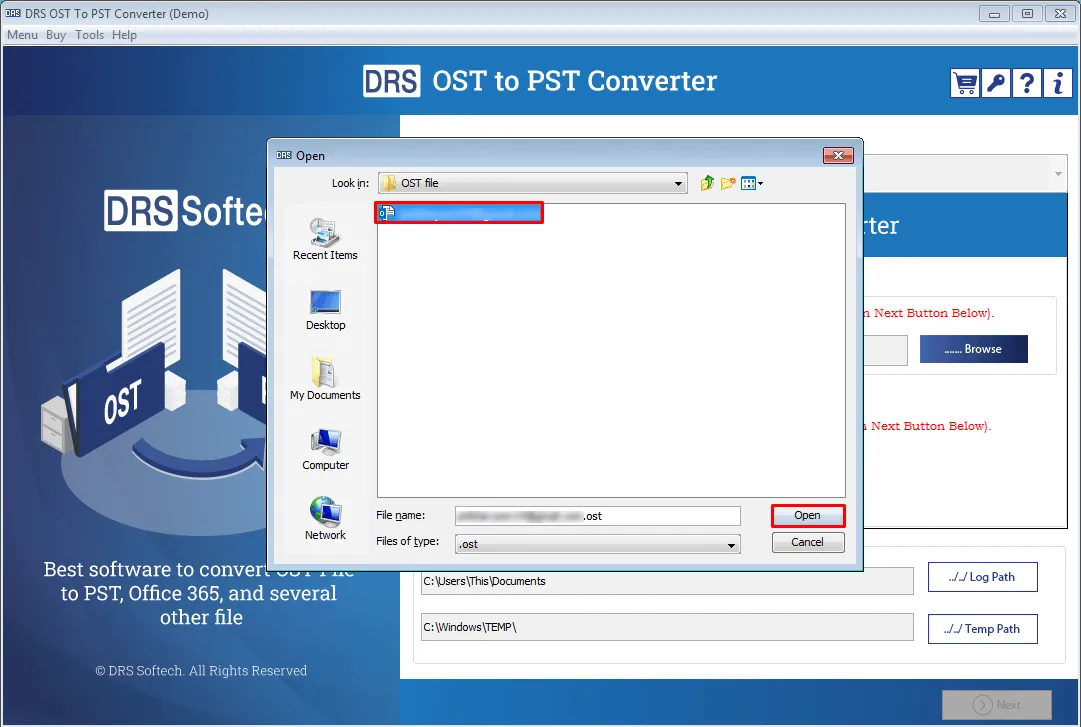
After that, click on the Browse button to add the desired OST file.
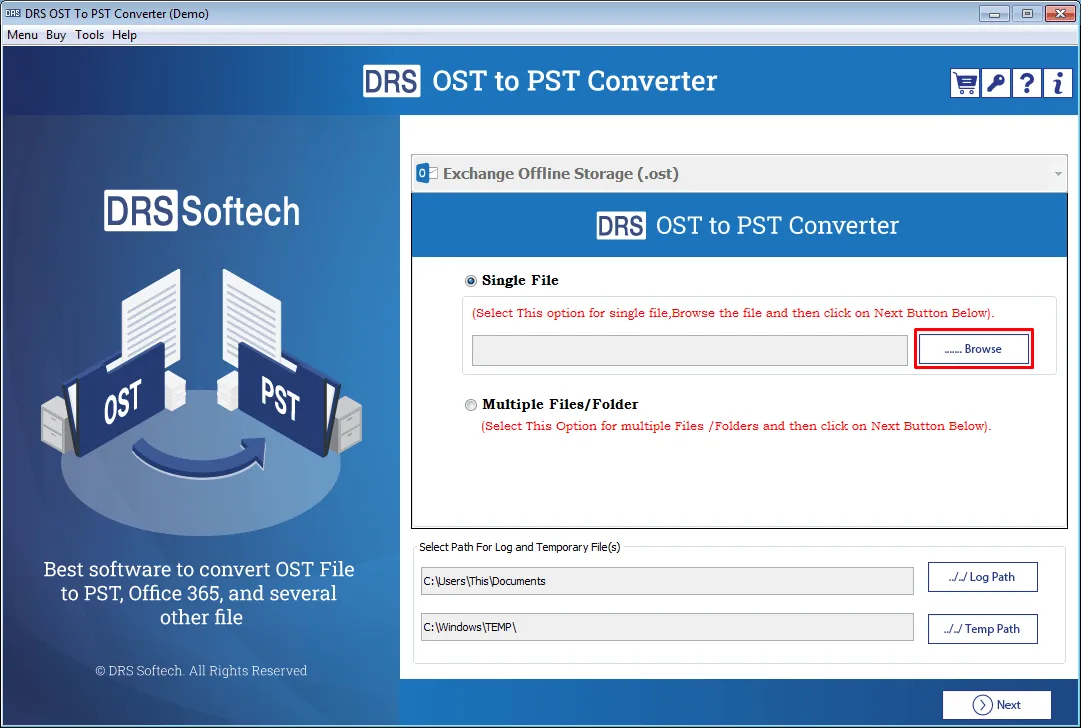
From the file explorer, locate the OST file. Select it, and press the Open button.
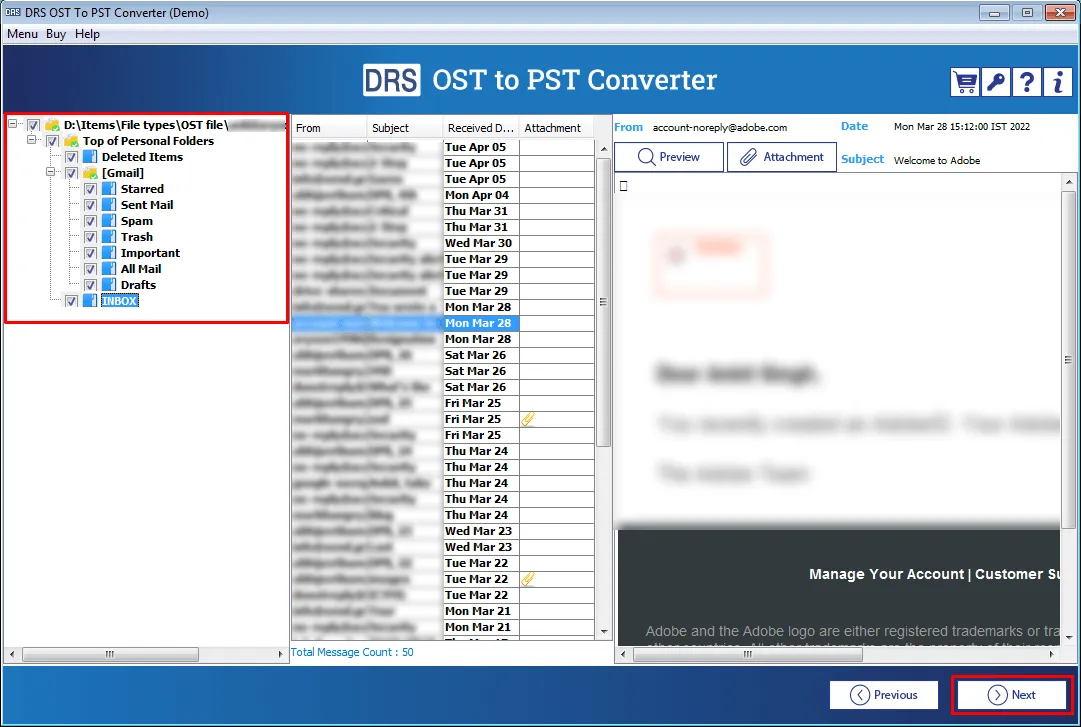
Now, you see the mailbox preview of the selected OST file in a tree structure. You can also check the emails by double-clicking on any mailbox folder.
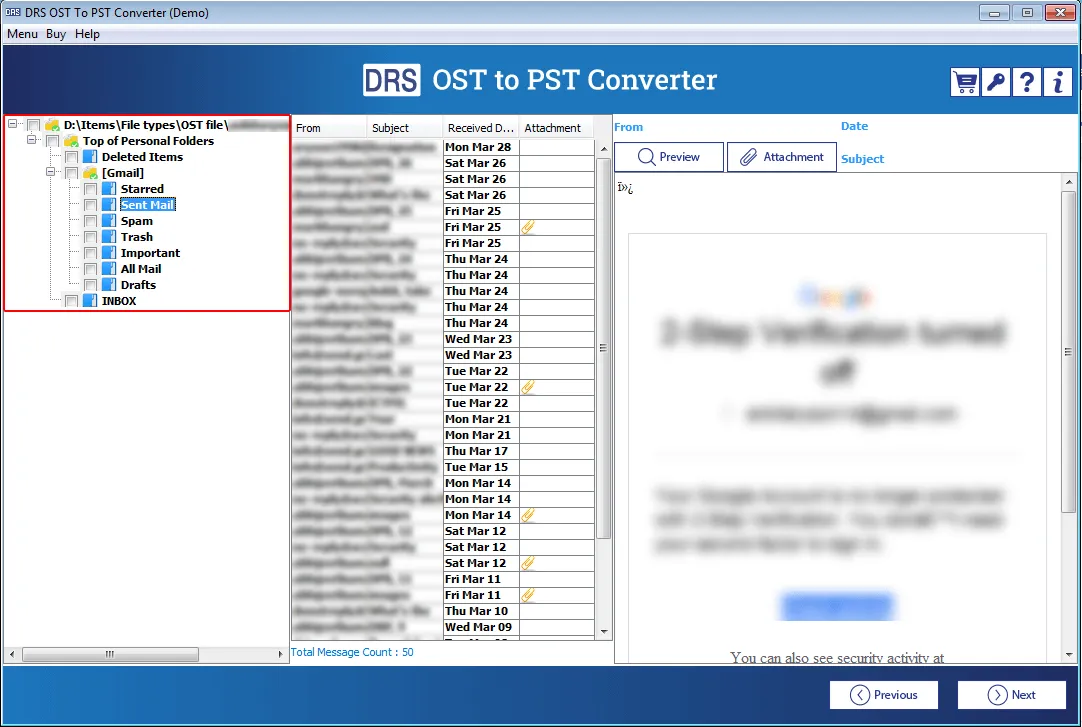
Tick the items you want to convert and press the Next button.
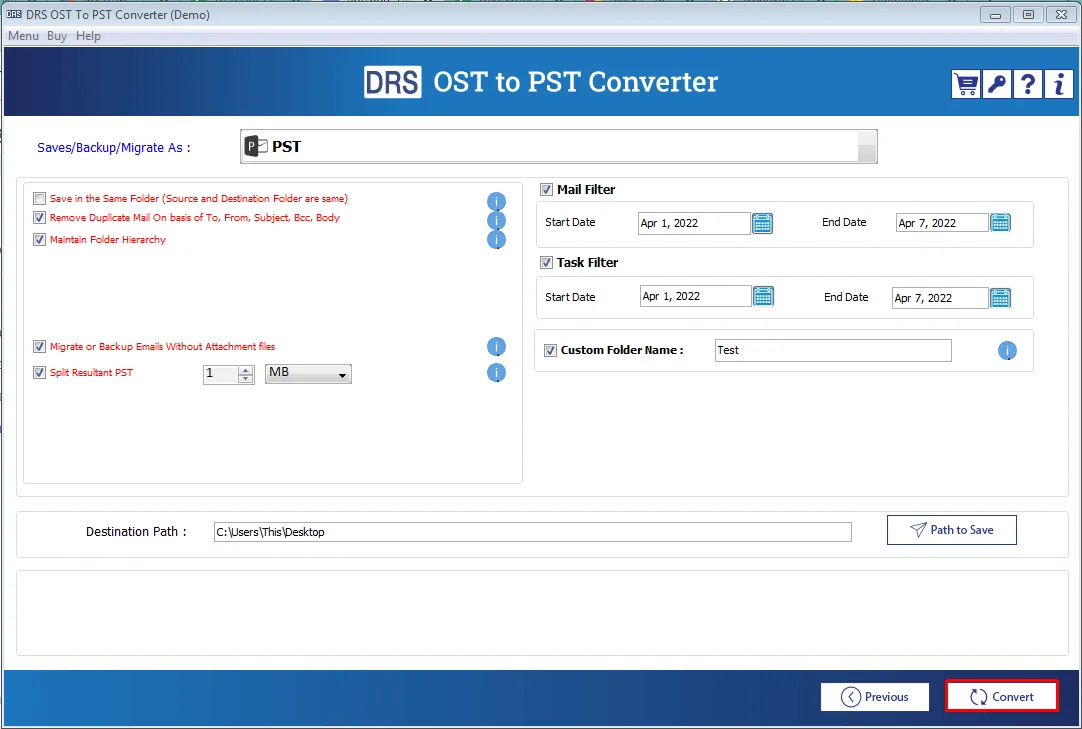
Now, you will see the main screen of the tool where you can define the properties related to migration.
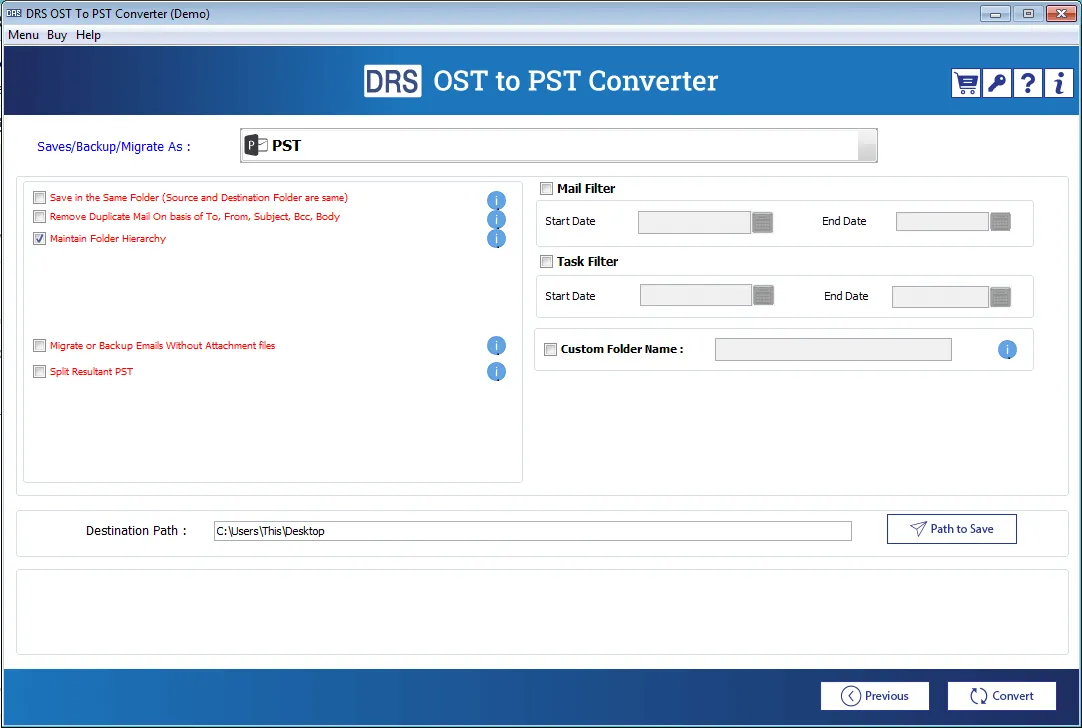
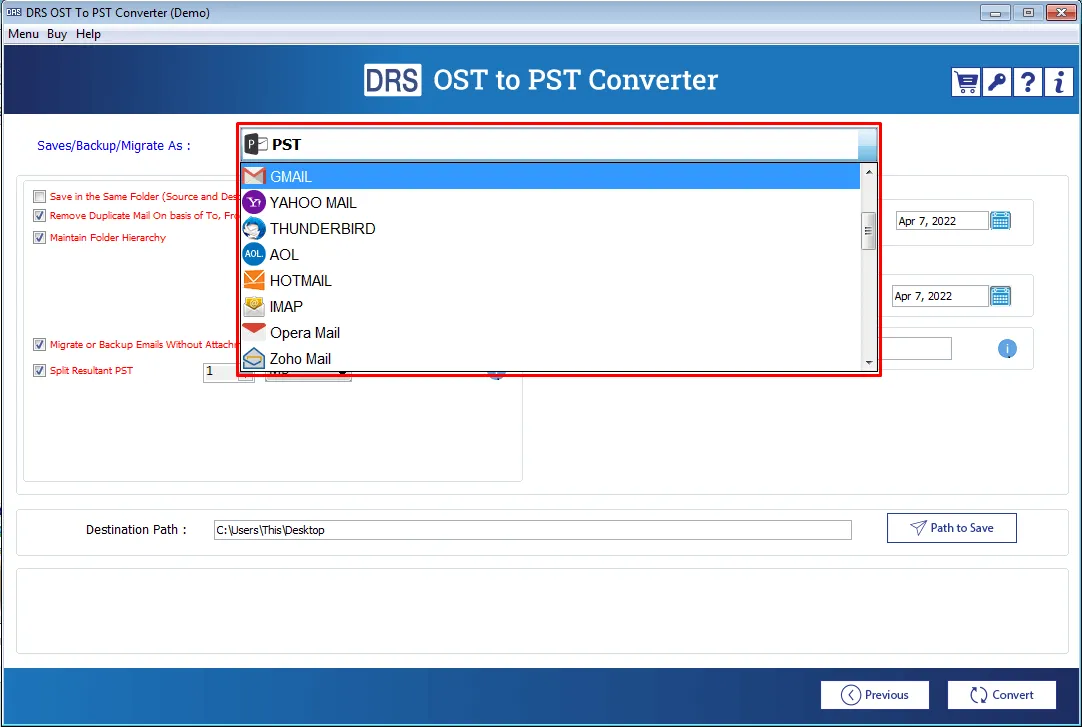
Click on the Save/Backup/Migrate As field to expand the list of file formats and email clients.
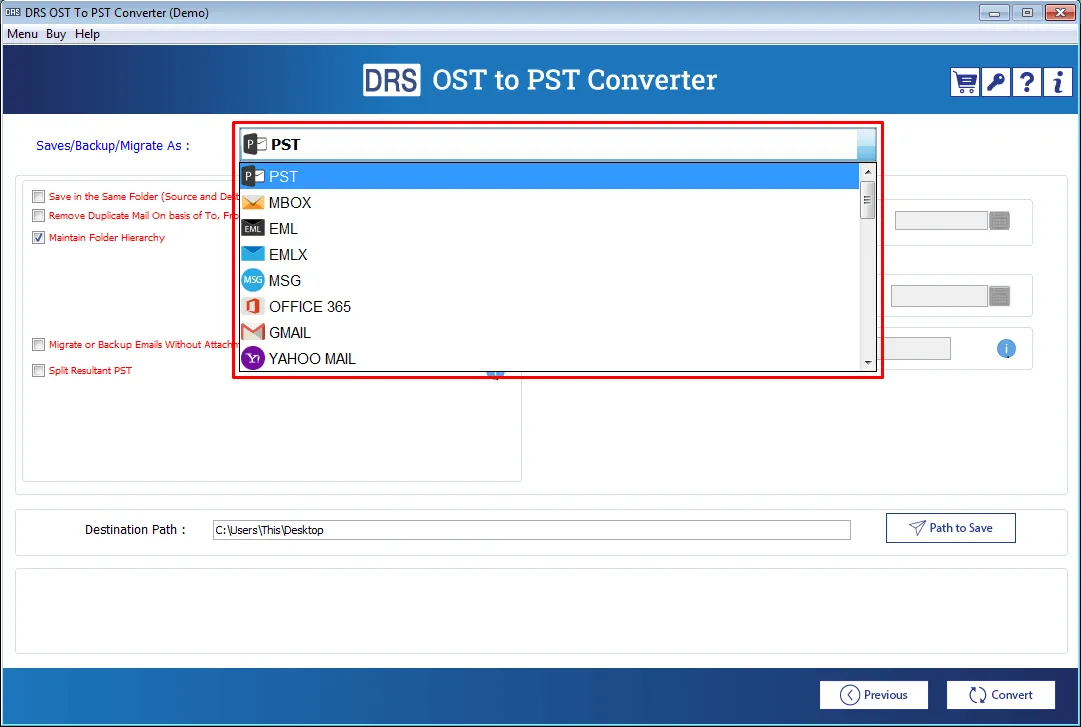
Select PST from the list.

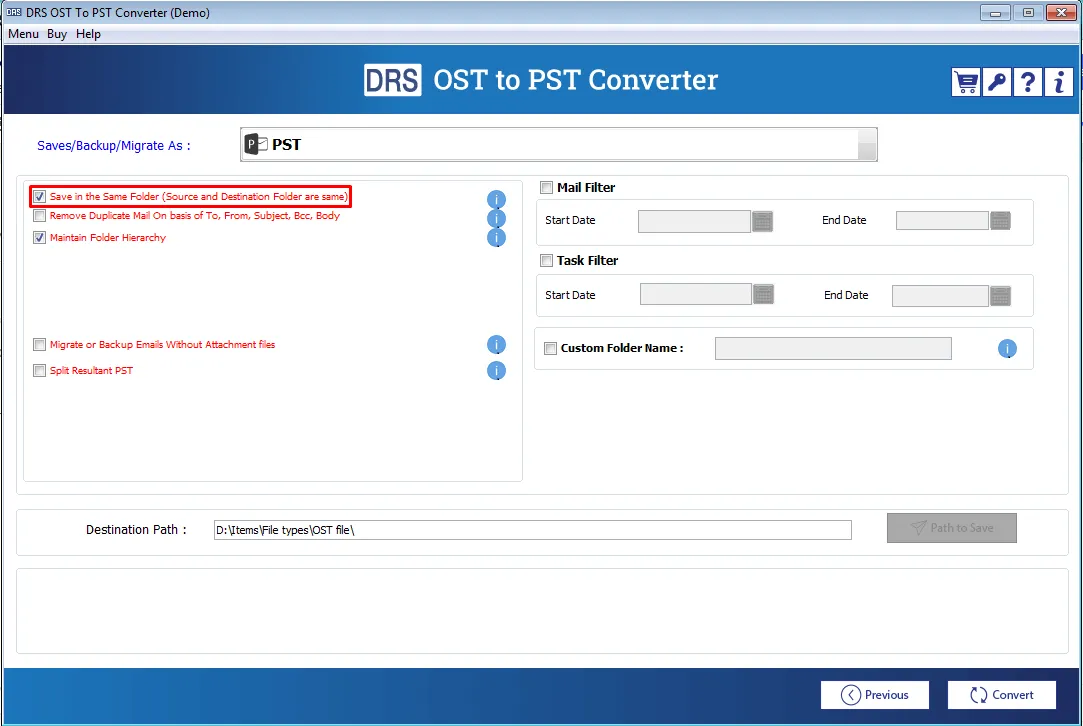
Tick the Save in Same Folder option. It will define the saving location of the resultant file to the folder containing the source file.
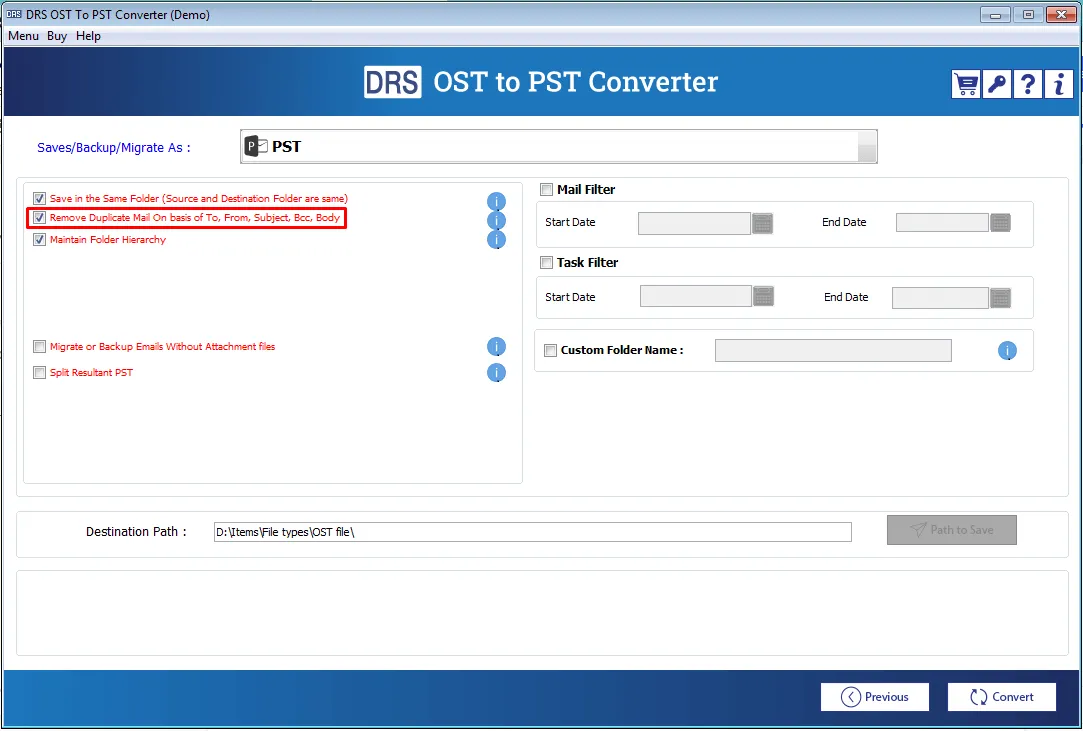
The Remove Duplicate Mail on basis of To, From, Subject, Bcc, Body option helps you to eliminate all duplicates from OST to PST conversion. Select it to avoid the migration of unnecessary items.
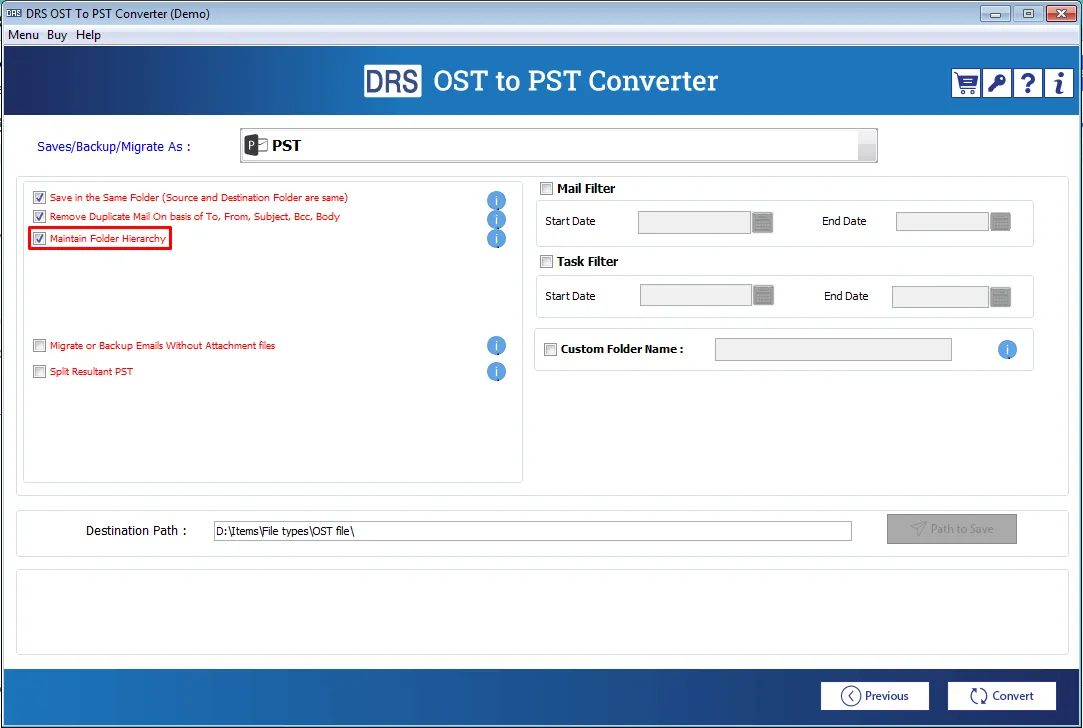
After that, the Maintain Folder Hierarchy is enabled by default. It keeps the mailbox data intact during OST to PST Conversion.
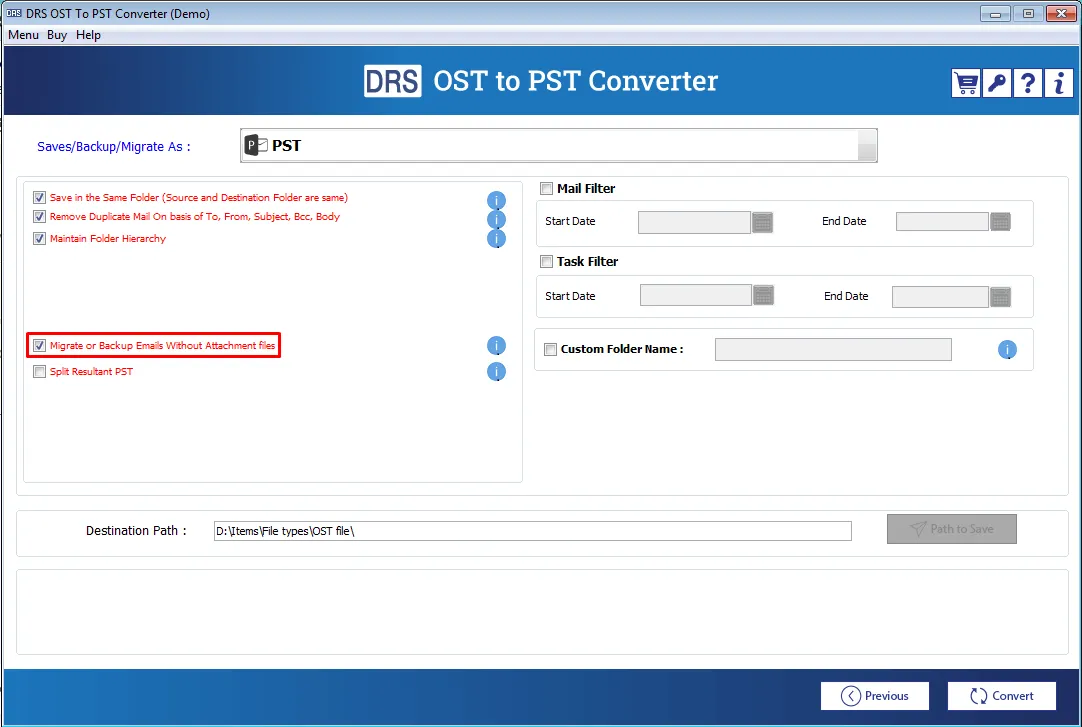
If you want to prevent email attachments from migration, tick the Migrate or Backup Emails without attachment files option.
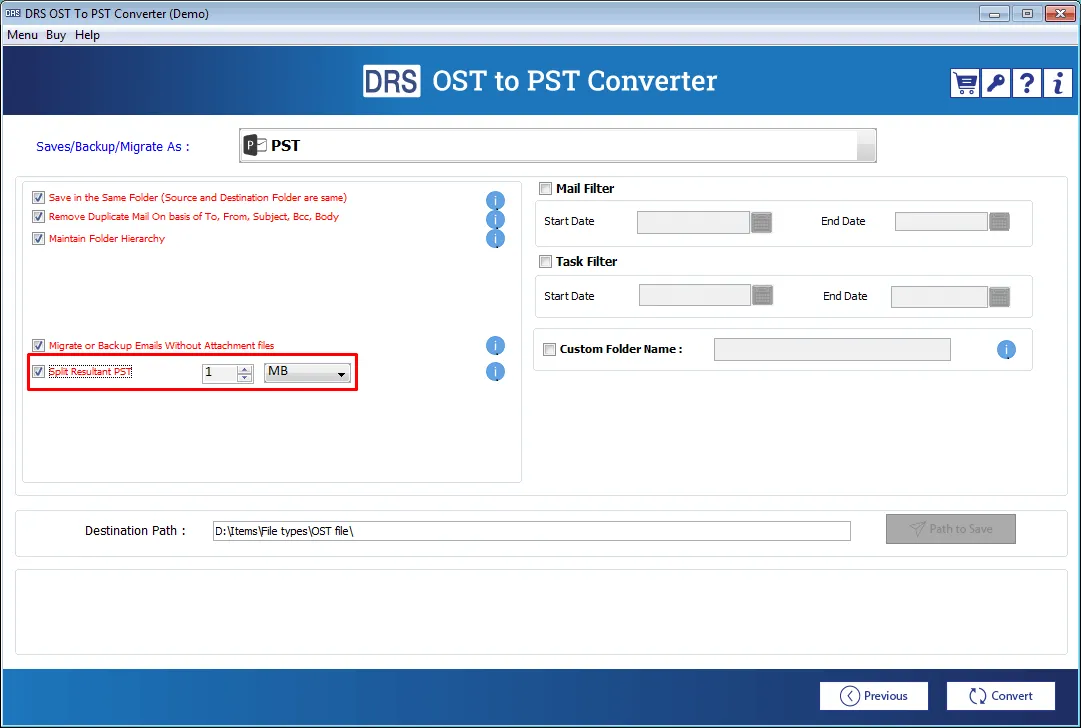
Next is the Split Resultant PST file option. Using this feature, you can split the output PST file into multiple smaller files of the desired size.
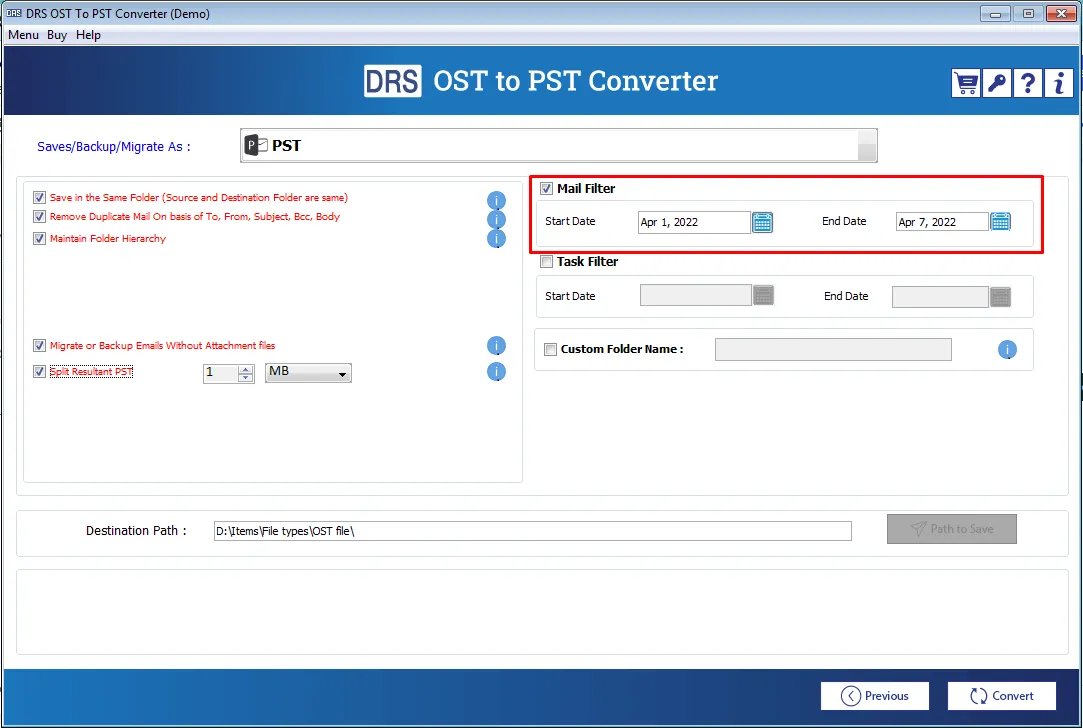
After that, tick the advanced Mail Filter option. It is a date range filter assisting you to convert emails of a specific date range. Choose a specific Start Date and End Date to define the date range.
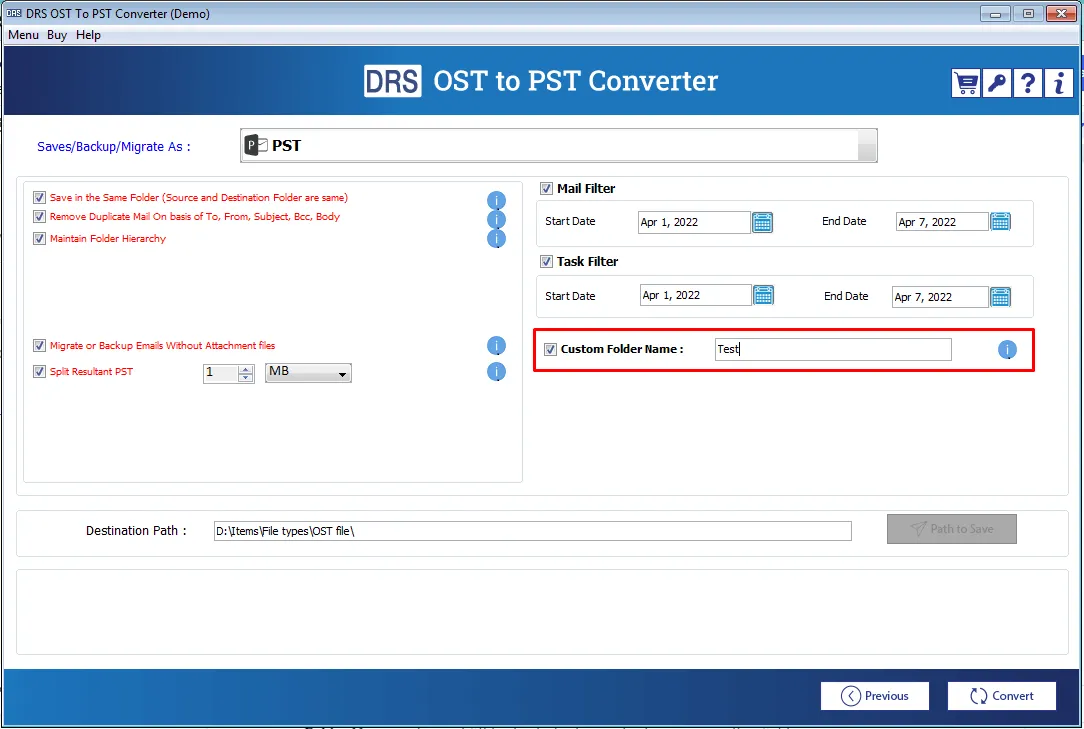
Similarly, select the Task filter option and enter the appropriate Start Date and End Date.

You can also name the folder containing the resultant PST file. Opt for the Custom Folder Name option and fill in the desired name in the corresponding field.
Next, click on the Path to Save button. This option helps you to assign the destination to the resultant file. You can also select the External drive location.

At last, click on the Convert button to start OST to PST Conversion.
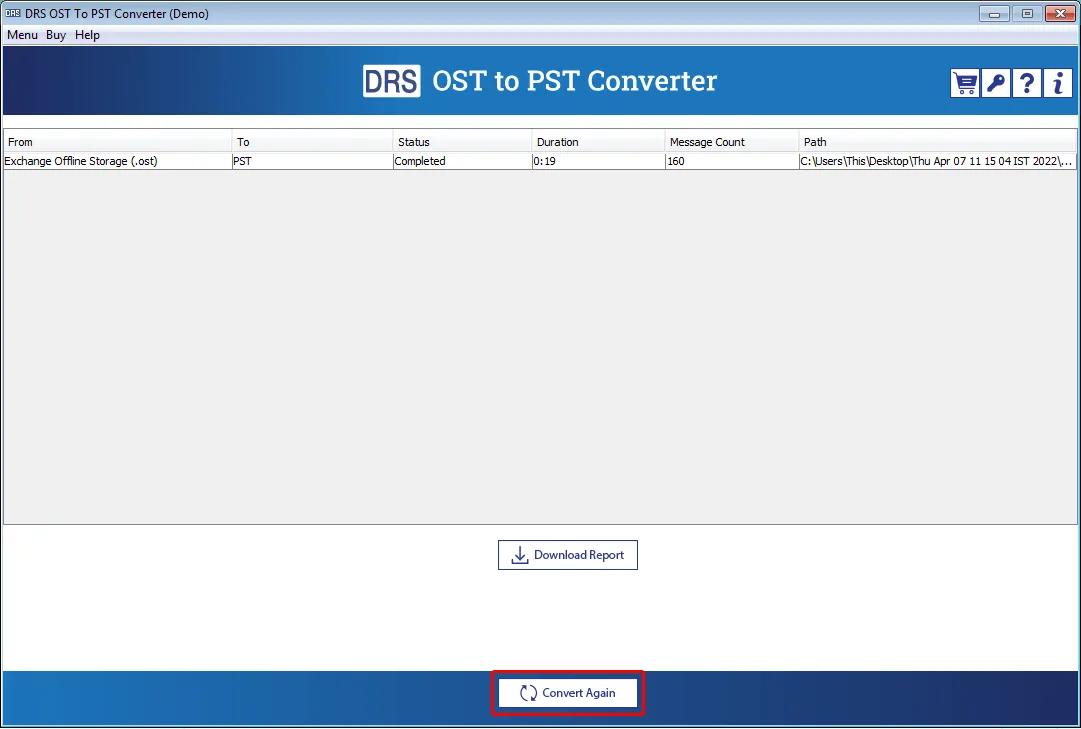
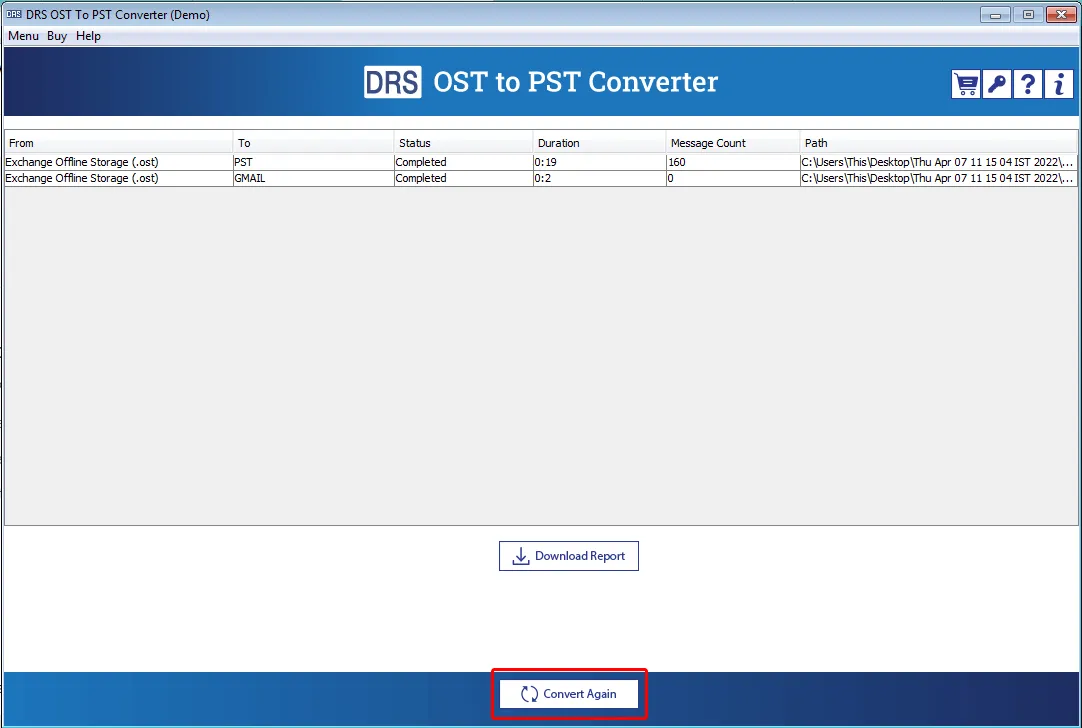
After completing the process, you will see the conversion report of the migration. Click on the Download Report button to download the report in CSV file format.
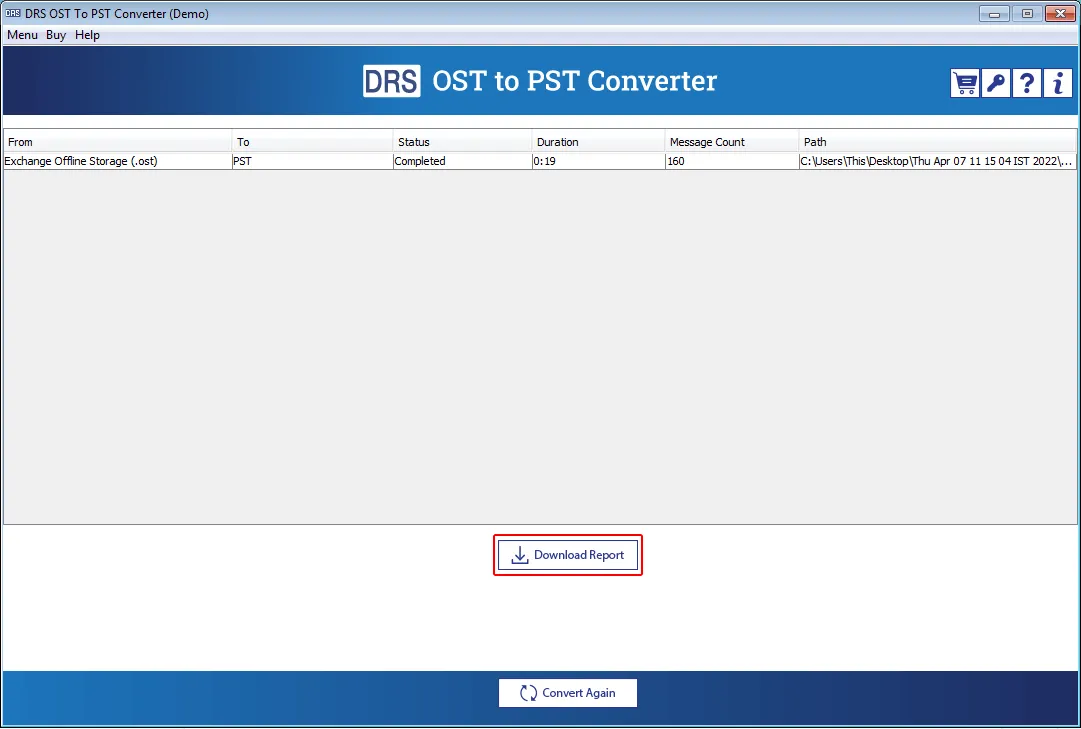
Also, press the Convert Again button if you want to convert the OST file to another file format.
To migrate your Outlook OST files to your Gmail email account, follow steps 1 to 8. After that, perform the below procedure.
Select Gmail email client from the list of file formats and email clients
Now, enter your Gmail username and password in the required fields and click on the Sign in button.
Note: You have to use a third-party app password instead of the regular password. If you don’t know how to generate an app password, click on the given link.

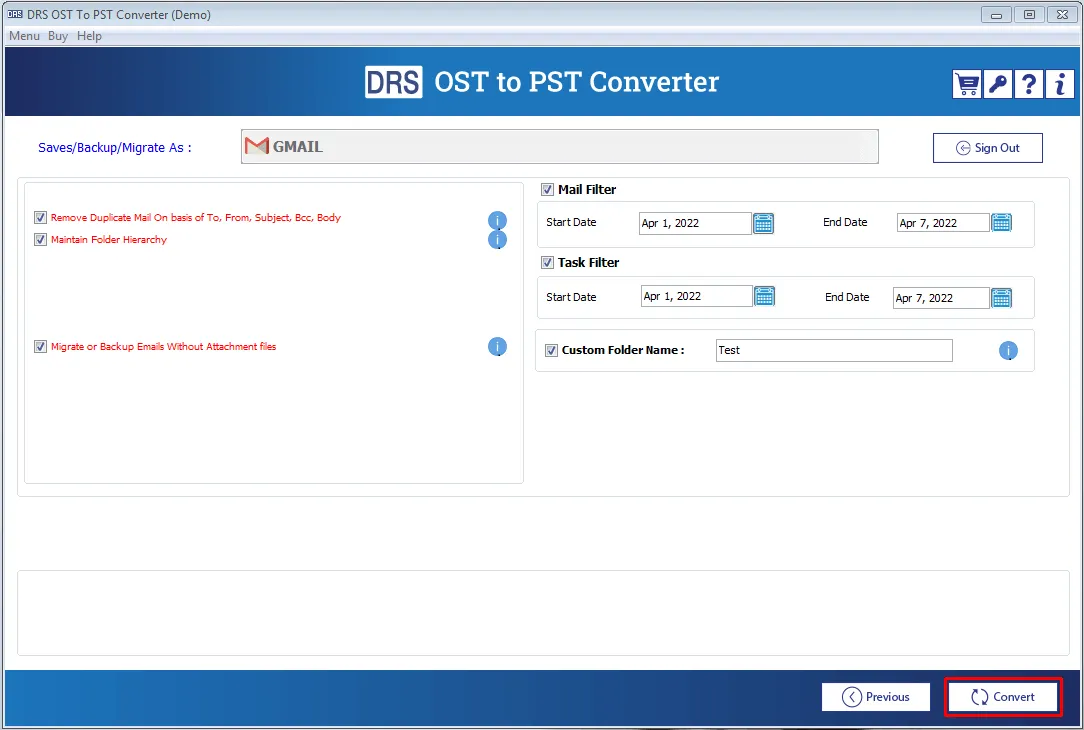
After successfully logging in, you will see Gmail in the Save/Backup/Migrate As field. You can sign out from the account at any time. Just click on the Sign Out button.
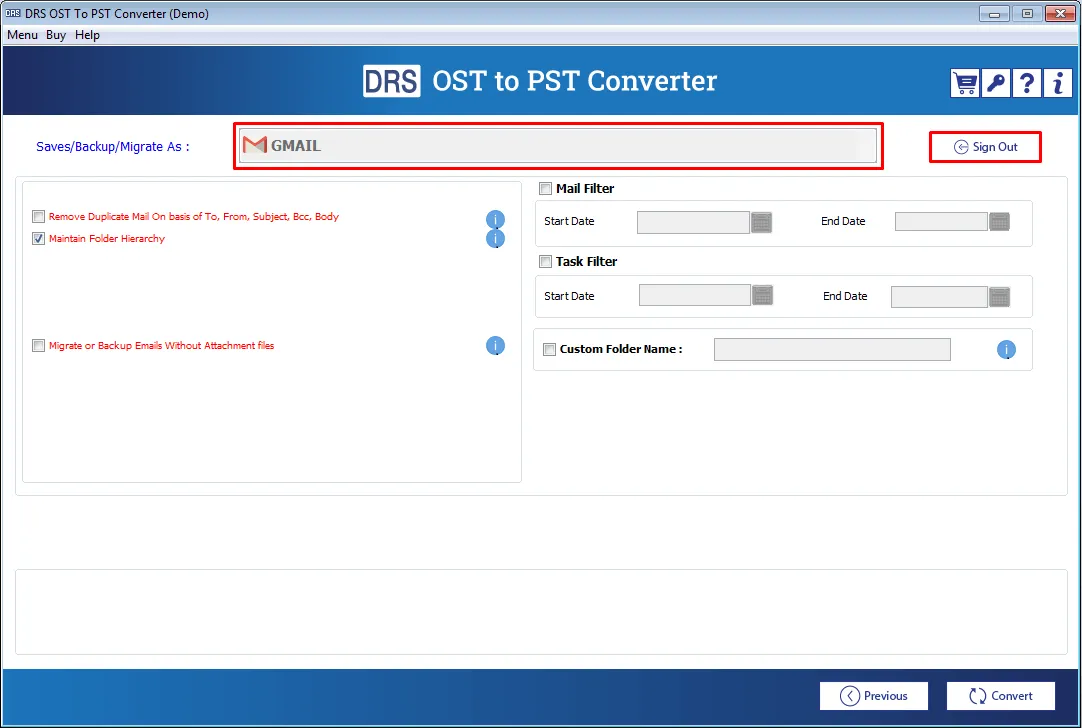
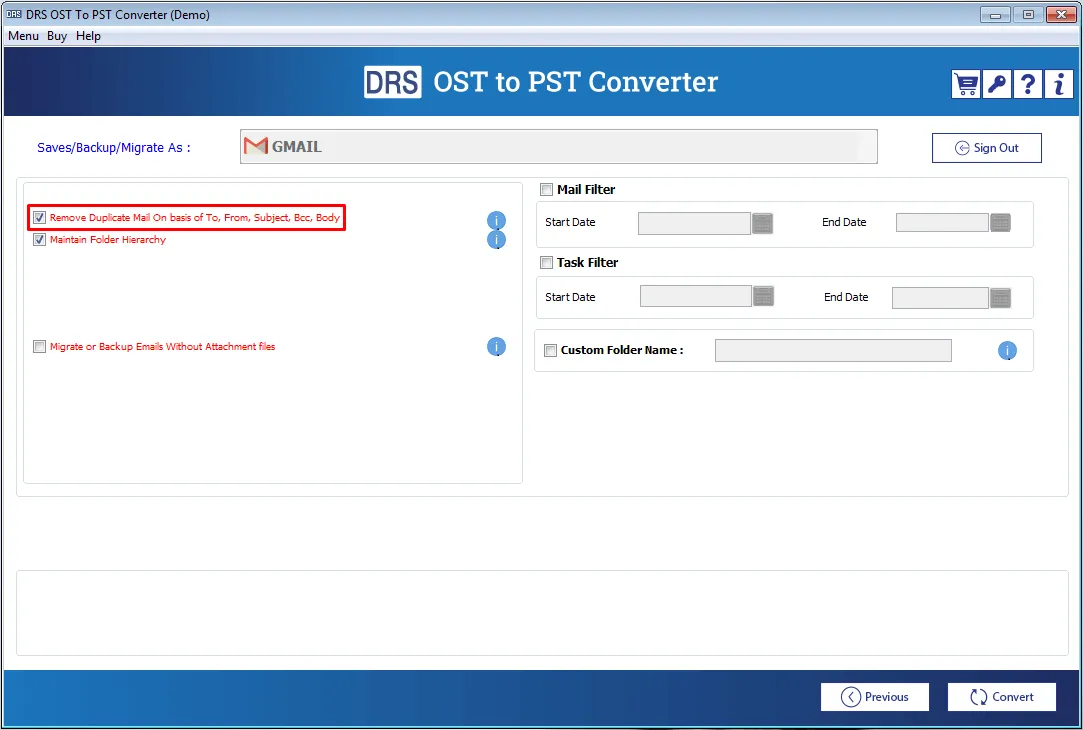
For avoiding duplicate mails from migration, tick the Remove Duplicate Mail on basis of to, from, subject, bcc, body option.
The Maintain folder hierarchy option is kept enabled by default. It sustains the structure of your mailbox data. However, if required, you can disable it.

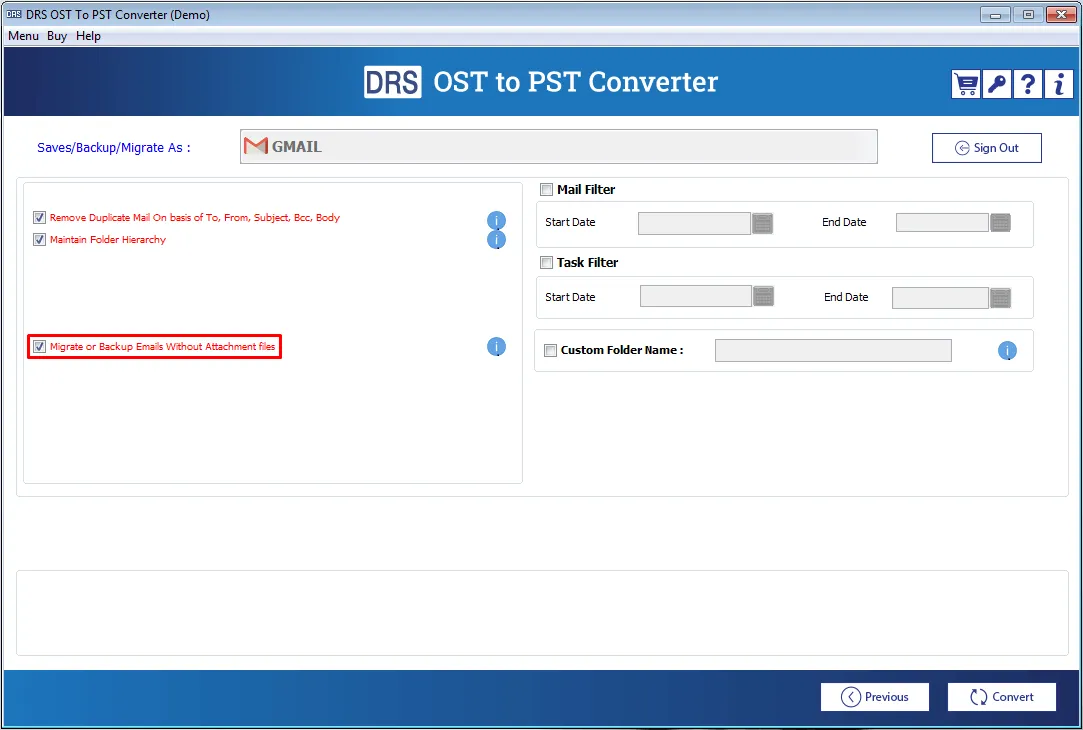
After that, if you want to migrate your OST file content without email attachments, opt for the Migrate or Backup Emails without Attachment Files option.
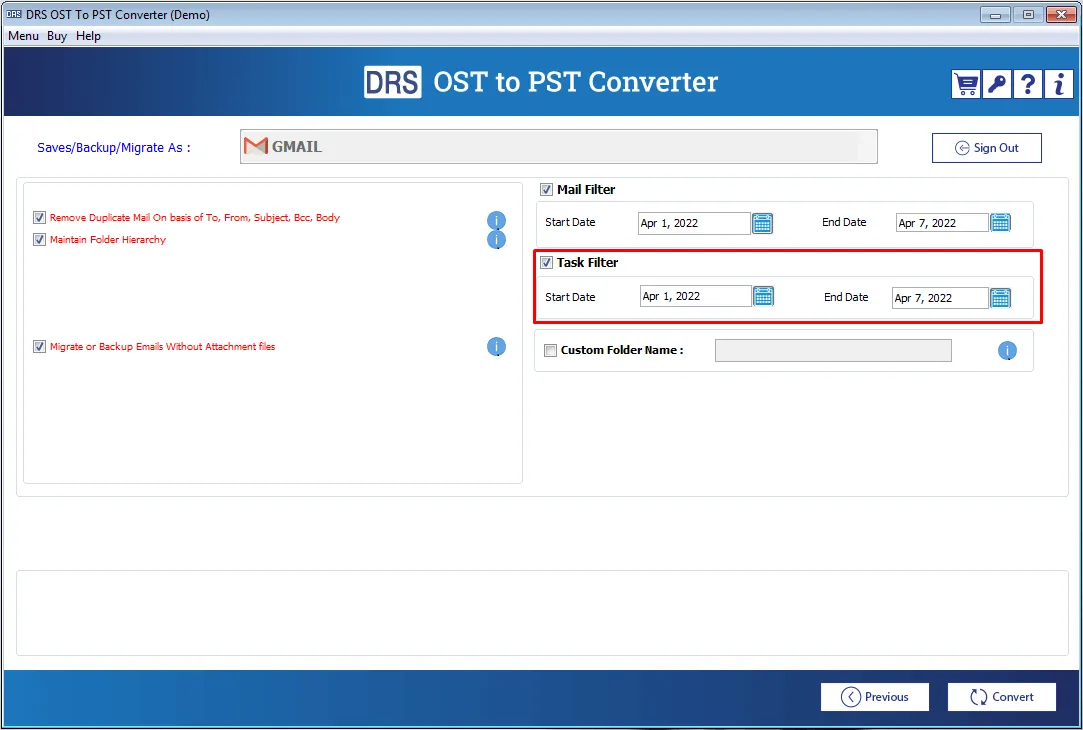
The Mail Filter is a date range filter. It allows you to migrate emails of a specific date range. Tick the Mail Filter and enter suitable Start Date and End Date.

Similarly, enable the Task filter option and fill in desired Start Date and End Date.
Next option is the Custom Folder Name. Using this option, you can give any particular name to the folder containing the resultant file. Tick this option and assign the name in the field.

At last, click on the Convert button to migrate your Outlook OST file to your Gmail email account.
After completing the process, click on the Download Report button to save a CSV file of the migration report.
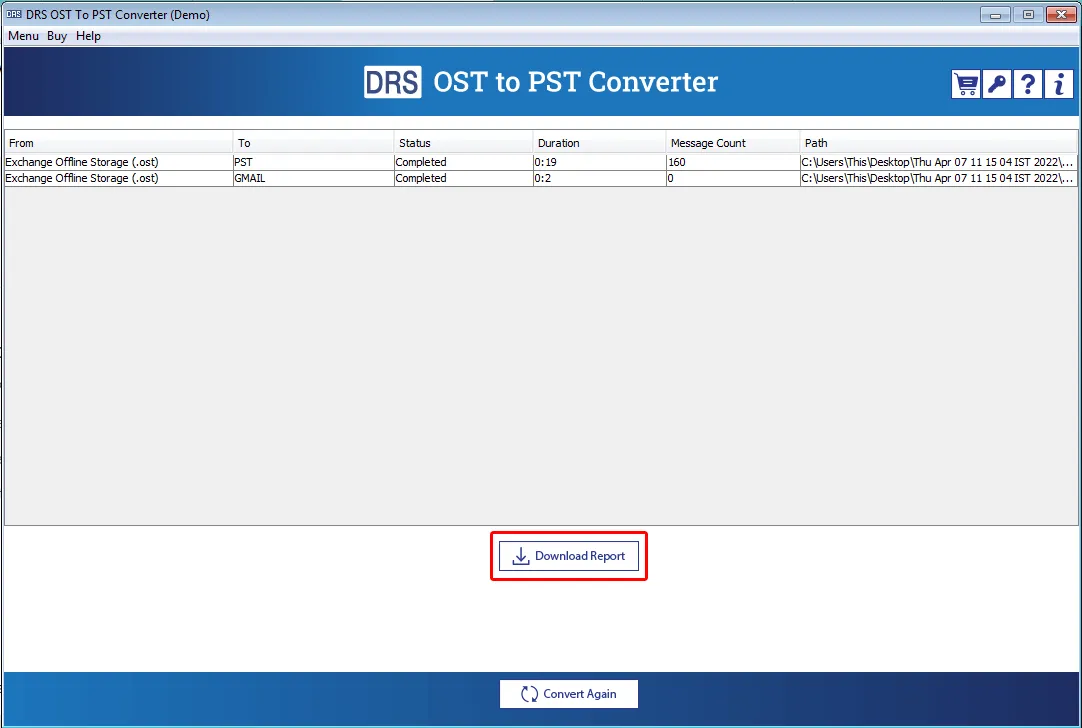
Also, you can click on the Convert Again button if you want to migrate OST to another email account.
30 Days
Money Back Gurantee*
100%
Safe and Secure
Free
Tech Support
Delivery
Instant Delivery by Email
McAfee SECURE
100% Secure

Millions of users have migrated their data securely using Cloud Migration Software. Stop performing complex DIY techniques and switch to the best solutions.