A Detailed Guide for Migrating G Suite Data
This software guide will help you understand the tool in detail. Furthermore, all its features are in-depth.
This software guide will help you understand the tool in detail. Furthermore, all its features are in-depth.
Download the CloudMigration G Suite Backup Tool and install it on your PC. Run the application with administrative privileges.
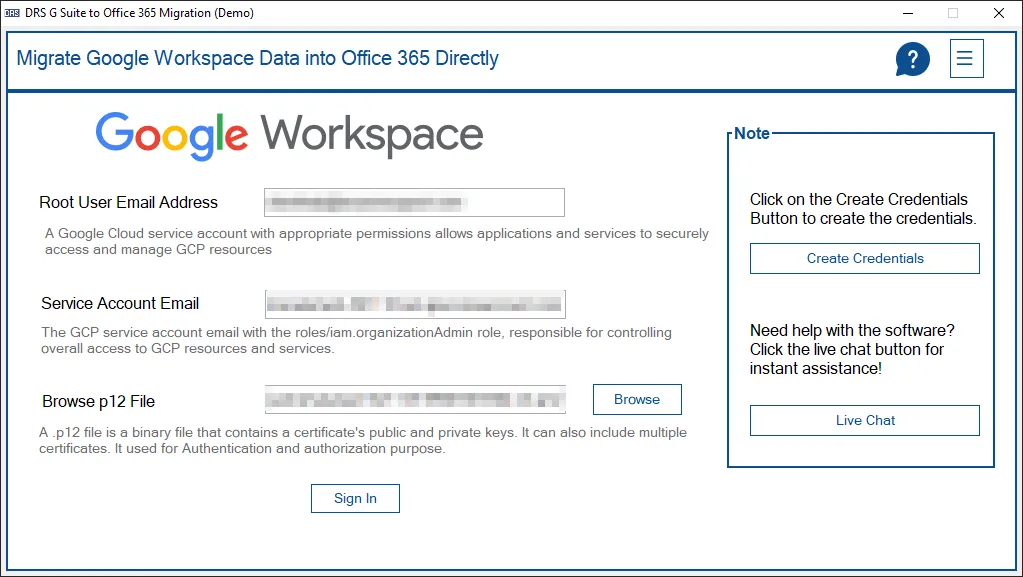
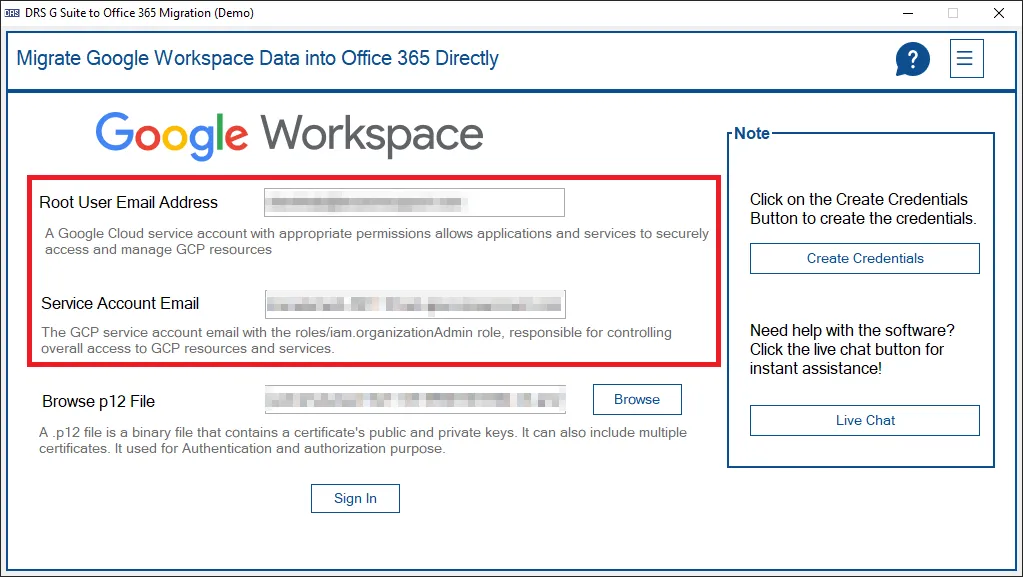
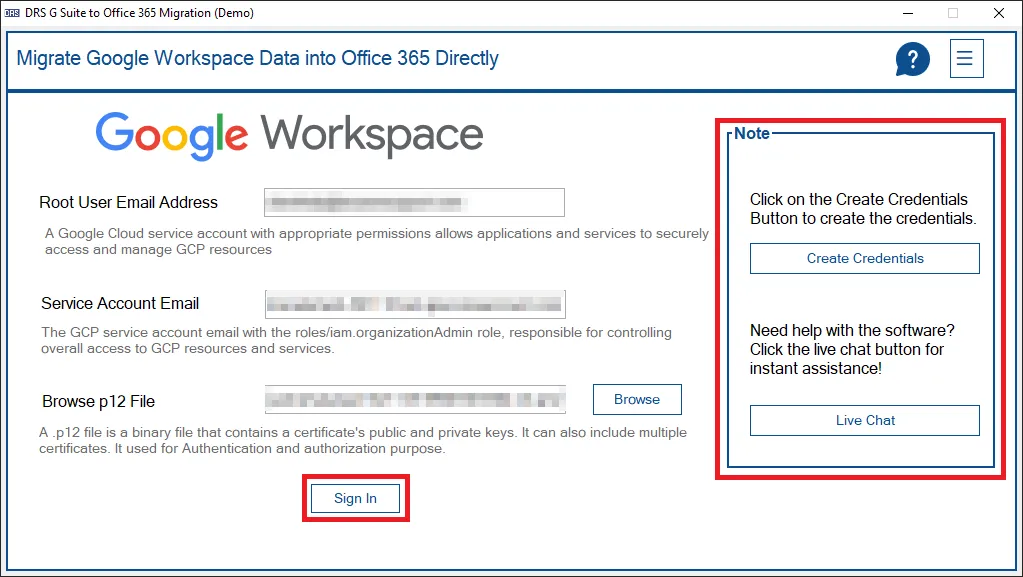
Enter the required login details: Root User Email Address and Service Account ID.
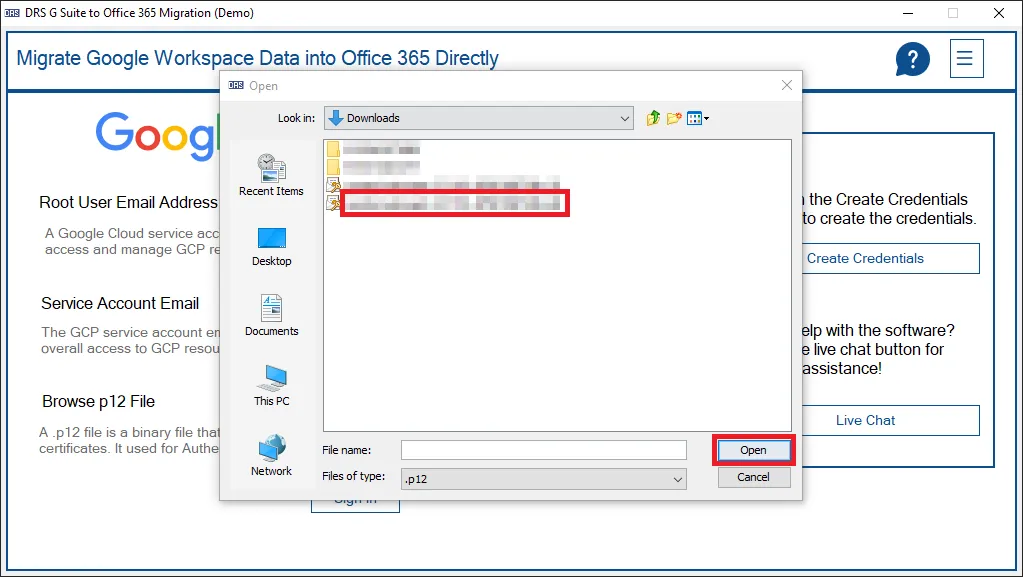
After that, click on the Browse button to add the p12 file.
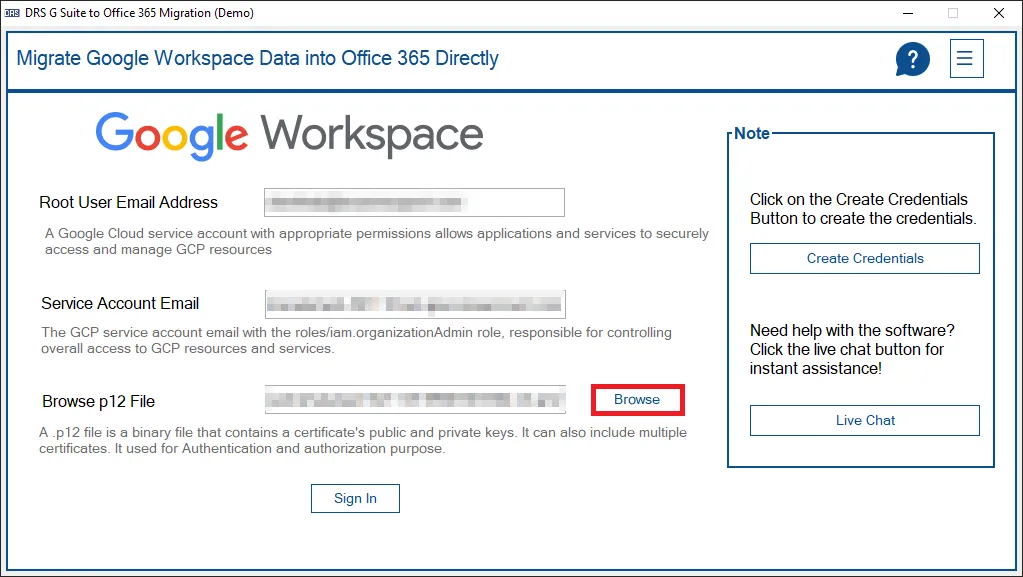
Now, choose the required p12 file from your system and click the Open button.
Press the Sign in button to log in to your G Suite account.
Note: You can click on the reference links in the right section of the tool. It will help you log in to your G Suite account.
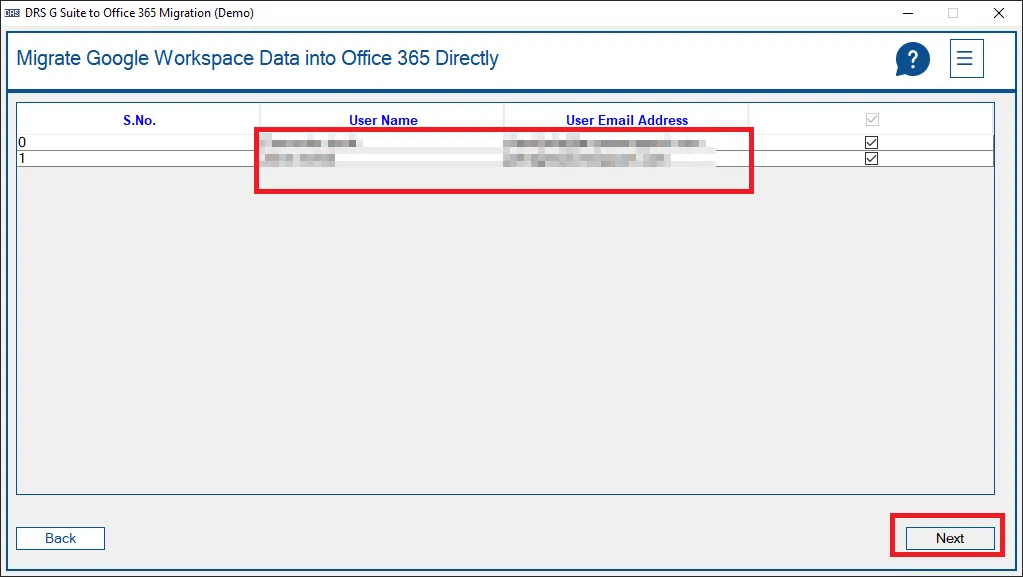
After successfully logging into your G Suite account, you will see all the user accounts. Select the accounts you want to create a backup of. Hit the Next button.
Now, you will see four Google applications: Drive, Contacts, Calendars, and Gmail. Choose the item you want to download. And press the Next button.

Select the Date filter option and enter appropriate dates in the Start Date and End Date. This option allows you to create a backup of the defined date range.
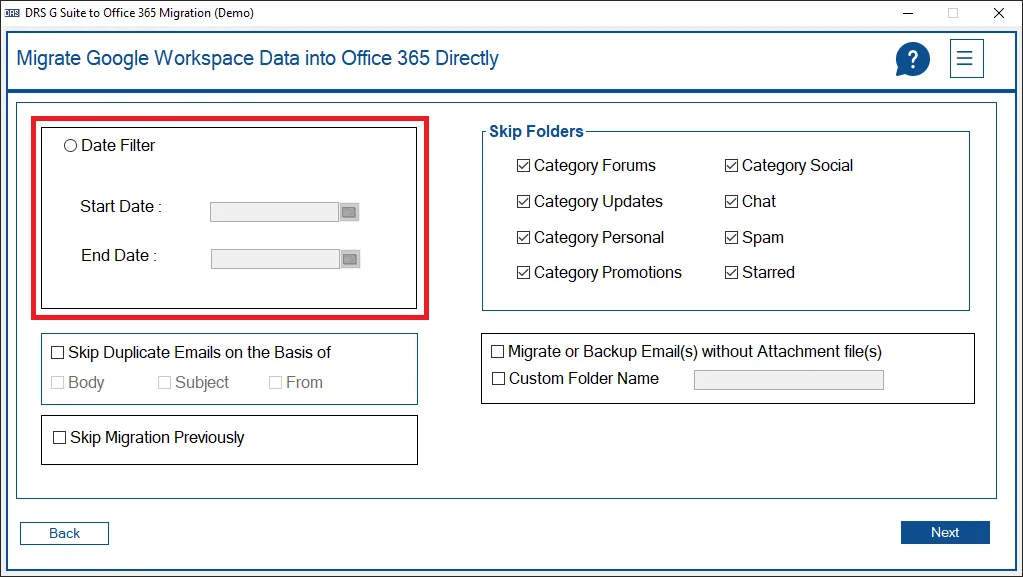
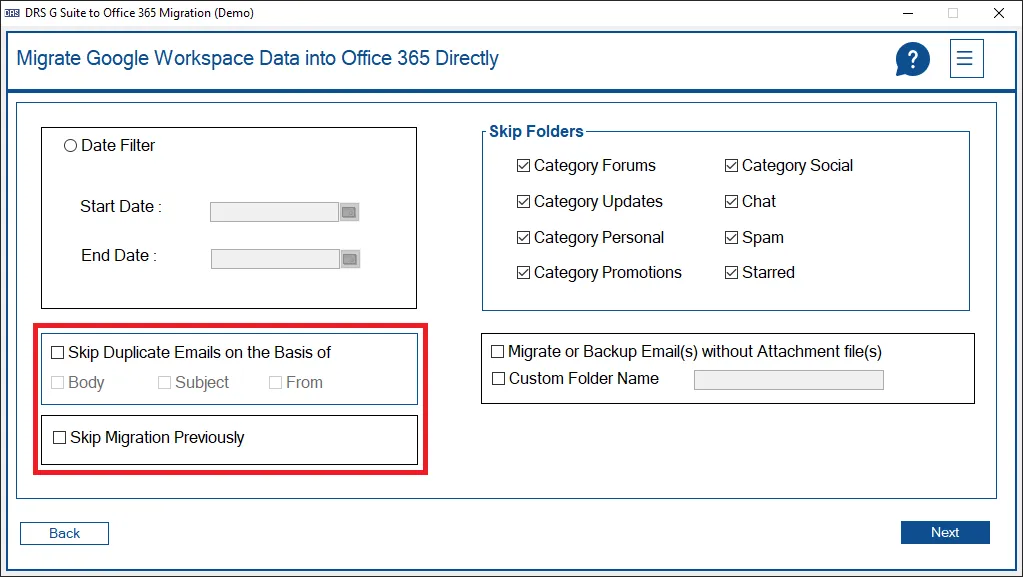
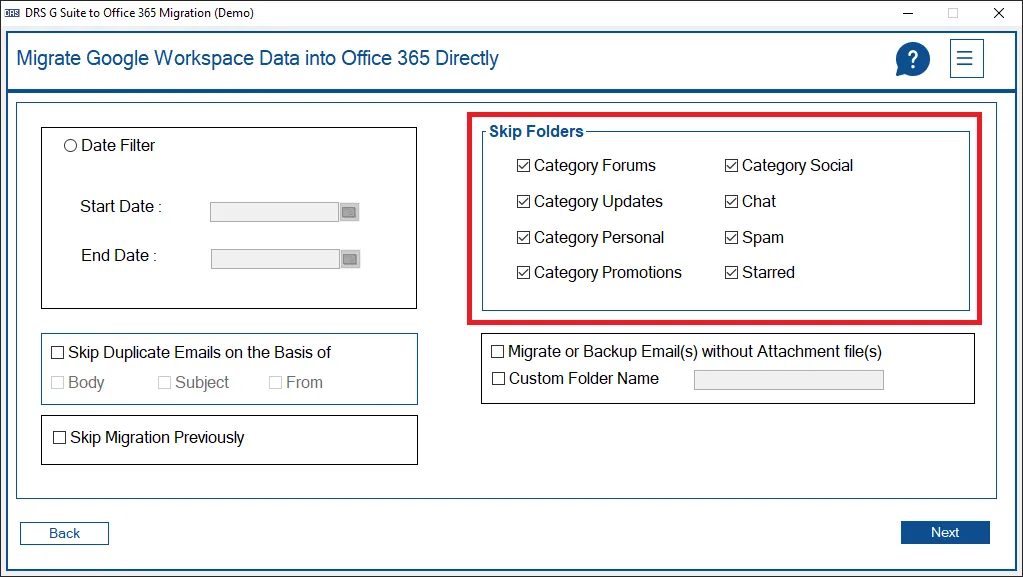
Now, you can select the Skip Folder option to skip the following folder on your Email for migration.
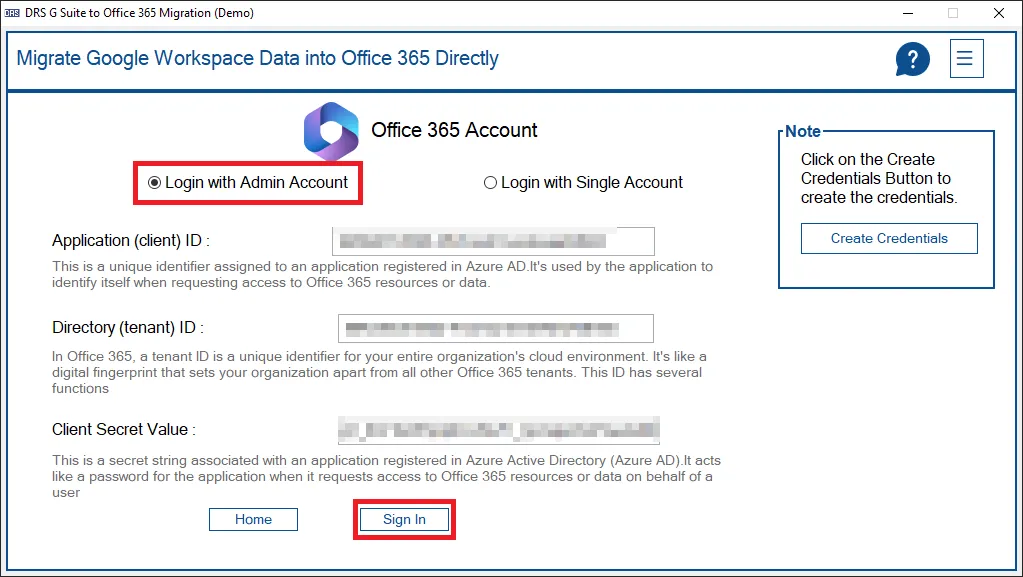
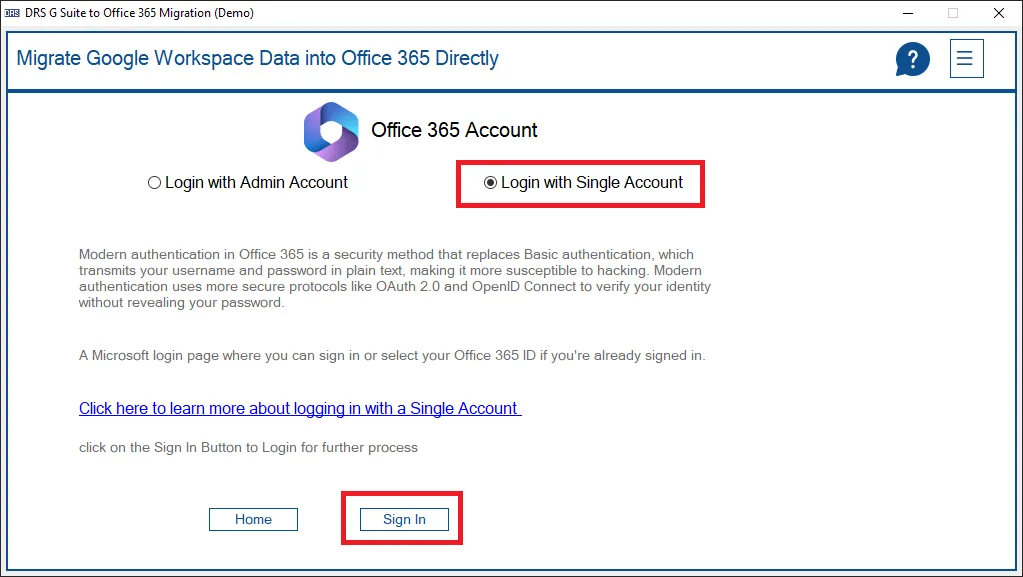
If you want to log in with an admin account select the first option and enter your credential. After that hit Sign in.
If you want to log in with a single account, select the second option. And, hit the sign-in button. (You have to sign with your browser)
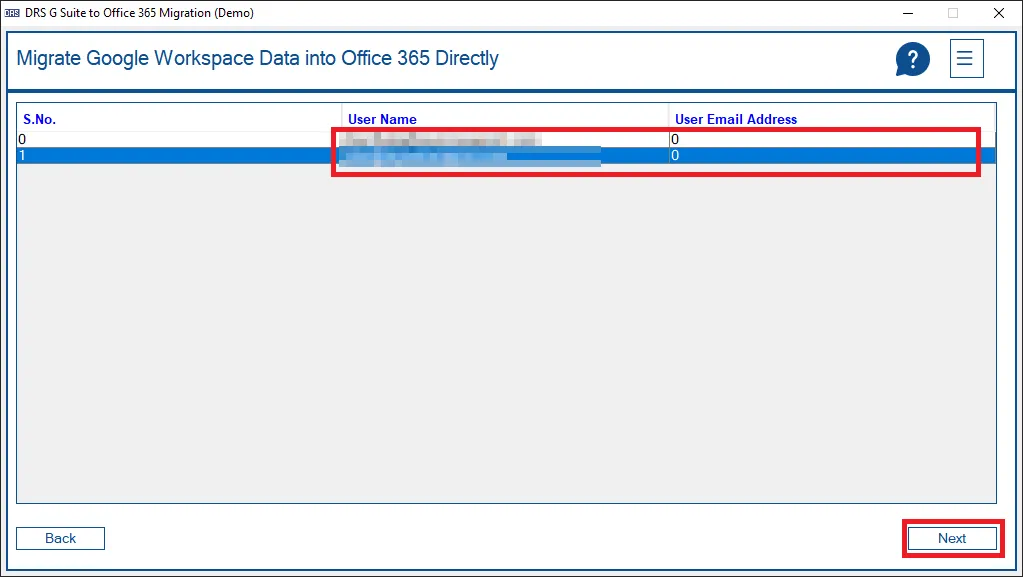
Now, preview all the user accounts in your Office 365 account. Additionally, Select the Desired Users and click Next.

Click on the User Email Address column and choose the Destination Office 365 User. Then click on the Next button to proceed further.
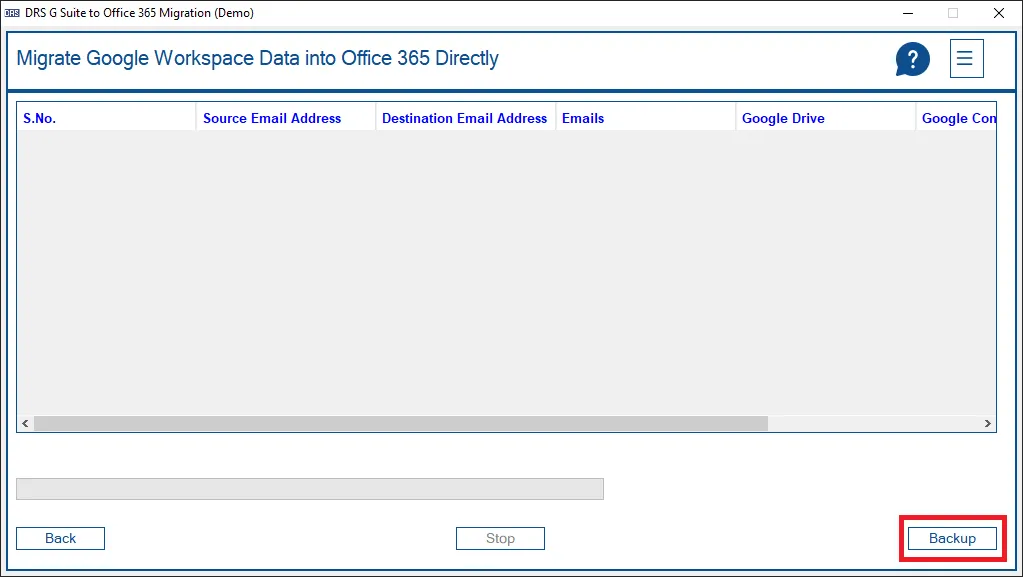
Now, you will be redirected to this window, click on the backup option to start the procedure.
Note: If you log in with a single account you will be directly redirected to this window.
30 Days
Money Back Gurantee*
100%
Safe and Secure
Free
Tech Support
Delivery
Instant Delivery by Email
McAfee SECURE
100% Secure

Millions of users have migrated their data securely using Cloud Migration Software. Stop performing complex DIY techniques and switch to the best solutions.